Skip to content

Ecce Signum

Immanentize the Empathy

  • Home
  • About Me
  • Published Works and Literary Matters
  • Indexes
  • Laboratory
  • Notebooks
  • RSS Feed

Tag: math

Another Resurrected Project: The Trigonometron

2020-09-11 John Winkelman

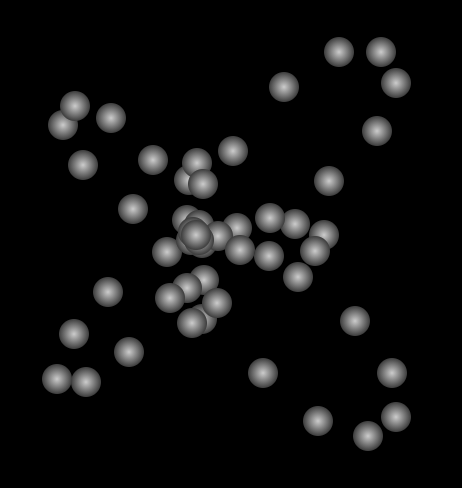
Click here to access the Trigonometron.

Much to my surprise, when browsing old(!) versions of this site using the Wayback Machine, I found the source code to the Trigonometron, one of the very first experiments I posted online, back at the beginning of 2002. This predates almost all of my Flash experiments, and indeed I ported this one to Flash a few years after I built the original in Dynamic HTML.

(Dynamic HTML, for you youngsters, it what we used to call it when you used Javascript to modify the HTML in a page without having to reload the page.)

Note that the version in the Laboratory section of this site is 99.99% unmodified from the original created almost twenty years ago. The only changes I made were to update the Javascript for positioning the elements so it works in modern browsers, and to change the balls from using a .gif image to using pure CSS for the graphics. Everything else is exactly as it was, including a check to see if the user is accessing the site with Netscape Navigator.

I may do a complete update to this project, as it was built for browsers running at 800×600 resolution following an early-2000s aesthetic, which means tiny, tiny text.

You can View Source of the Trigonometron to see what coding looked like in all its glory, back in 2001 and 2002.

Posted in ProgrammingTagged Javascript, math, web development comment on Another Resurrected Project: The Trigonometron

3D Langton’s Ant, in Actionscript 3 Using Away3d

2012-04-12 John Winkelman

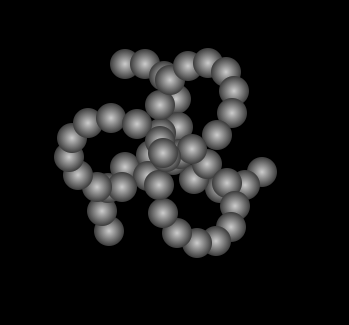
Fast on the heels of the 3D Langton’s Ants in Javascript  using Three.js, here is a version done in Actionscript 3 using Away3d. This will look better on faster computers. Click the image to launch the experiment.

Other than some additional rotation around the main axis, it is identical to the Javascript version, including a glitch that kicks in somewhere around 1200 cubes. In the Javascript version, Chrome would crash at around 700 cubes. In this version, it starts to get a little glitchy at 1600, then progressively more glitchy until it eventually stops updating the screen completely. Oddly, the script continues to run; you will be able to see the number of cubes increment in the upper left corner. I am not sure if this is a hard limit built into Away3d, or the Flash 3D API, or if there is a memory limit of some kind being reached. I suspect – based on the occasional warnings which popped up during development – that it is a hard-coded polygon limit within Away3d. There is probably some way around it, but I don’t (yet) have the know-how to go in and fix it.

Anyway, here is the code for the experiment. Comment out any lines which use the “org.eccesignum.*” files; they assume you have the code for my custom InfoPanel in your library path.

package {
	import away3d.cameras.Camera3D;
	import away3d.containers.ObjectContainer3D;
	import away3d.containers.Scene3D;
	import away3d.containers.View3D;
	import away3d.entities.Mesh;
	import away3d.lights.DirectionalLight;
	import away3d.lights.PointLight;
	import away3d.materials.ColorMaterial;
	import away3d.materials.lightpickers.*;
	import away3d.primitives.SphereGeometry;
	import away3d.primitives.CubeGeometry;
	
	import flash.display.Sprite;
	import flash.display.StageAlign;
	import flash.display.StageScaleMode;
	import flash.events.Event;
	import flash.events.MouseEvent;
	import flash.events.TimerEvent;
	import flash.geom.Vector3D;
	import flash.utils.Timer;
	
	import org.eccesignum.utilities.InfoPanel;
	
	[SWF(width=640,height=480,frameRate=32,backgroundColor=0x000000)]
	
	public class Main extends Sprite {
		internal var _info:InfoPanel;
		private var view:View3D;
		private var cubeContainer:ObjectContainer3D;
		private var scene:Scene3D;
		private var camera:Camera3D;
		private var directionalLight:DirectionalLight;
		private var lightPicker:StaticLightPicker
		private var cMaterial:ColorMaterial;
		private var antX:Number = 32,
			antY:Number = 32,
			antZ:Number = 32,
			nextX:Number,
			nextY:Number,
			nextZ:Number,
			cellsX:int = 64,
			cellsY:int = 64,
			cellsZ:int = 64,
			cellWidth:int = 8,
			cellHeight:int = 8,
			cellDepth:int = 8,
			antSize:int = 7,
			maxDirections:Number = 8,
			colorMultiplier:Number = Math.round(256/cellsX),
			xOff:Number = cellsX/2*cellWidth,
			yOff:Number = cellsY/2*cellHeight,
			zOff:Number = cellsZ/2*cellDepth,
			objects:Array,
			antDirection:Number = 1,
			filledCells:int = 0;
		
		public function Main():void {
			addEventListener(Event.ADDED_TO_STAGE,onAddedToStage);
		}
		private function onAddedToStage(e:Event):void {
			removeEventListener(Event.ADDED_TO_STAGE,onAddedToStage);
			stage.scaleMode = StageScaleMode.NO_SCALE;
			stage.align = StageAlign.TOP_LEFT;
			init();
		}
		private function init():void {
			_info = new InfoPanel(this,100,50);
			scene = new Scene3D();
			camera = new Camera3D();
			view = new View3D(null,camera);
			view.antiAlias = 2;
			camera.x = 0;
			camera.z = 150;
			camera.y = -300;
			cubeContainer = new ObjectContainer3D();
			cubeContainer.rotationY=0;
			cubeContainer.rotationZ=45;
			
			directionalLight = new DirectionalLight(0,150,-300);
			directionalLight.diffuse = 1;
			directionalLight.specular = 0.3;
			directionalLight.color=0xffffff;
			scene.addChild(directionalLight);
			lightPicker = new StaticLightPicker([directionalLight]);
			
			cMaterial = new ColorMaterial(0x999999);
			cMaterial.lightPicker  = lightPicker;
			
			scene.addChild(cubeContainer);
			camera.lookAt(new Vector3D(0,0,0));
			view.scene = scene;
			addChild(view);

			objects = new Array(cellsX);
			for(var i:int=0;i<objects.length;i++) {
				objects[i] = new Array(cellsY);
				for(var j:int=0;j<objects[i].length;j++) {
					objects[i][j] = new Array(cellsZ);
				}
			}
			view.render();
			addEventListener(Event.ENTER_FRAME,onEnterFrame);
		}
		private function onEnterFrame(e:Event):void {
			if(!objects[antX][antY][antZ]) {
				antDirection++;
				if(antDirection == maxDirections) antDirection = 0;
				addObject(antX,antY,antZ);
			} else {
				removeObject(antX,antY,antZ);
				antDirection--;
				if(antDirection == -1) antDirection = maxDirections-1;
			}
			switch(antDirection) {
				case 0:
					antZ--;
					break;
				case 1:
					antX++;
					break;
				case 2:
					antY++;
					break;
				case 3:
					antX--;
					break;
				case 4:
					antZ++;
					break;
				case 5:
					antX++;
					break;
				case 6:
					antY--;
					break;
				case 7:
					antX--;
					break;
				default:
					break;
			}
			if(antY < 0) antY += cellsY;
			if(antY >= cellsY) antY -= cellsY;
			if(antX < 0) antX += cellsX;
			if(antX >= cellsX) antX -= cellsX;
			if(antZ < 0) antZ += cellsZ;
			if(antZ >= cellsZ) antZ -= cellsZ;

			cubeContainer.rotationZ+=.5;
			cubeContainer.rotationY+=.5;
			cubeContainer.rotationX+=.5;
			_info.update(filledCells.toString(),true);
			view.render();
		}
		private function addObject(x:int,y:int,z:int):void {
			var cGeometry:CubeGeometry = new CubeGeometry();
				cGeometry.width = antSize;
				cGeometry.height = antSize;
				cGeometry.depth = antSize;
			var cMesh:Mesh = new Mesh(cGeometry,cMaterial);
				cMesh.x = x*cellWidth-xOff;
				cMesh.y = y*cellHeight-yOff;
				cMesh.z = z*cellDepth-zOff;
			cubeContainer.addChild(cMesh);
			objects[x][y][z] = cMesh;
			filledCells++;
		}
		private function removeObject(x:int,y:int,z:int):void {
			cubeContainer.removeChild(objects[x][y][z]);
			objects[x][y][z].material.dispose();
			objects[x][y][z].dispose();
			objects[x][y][z] = null;
			filledCells--;
		}
		private function getRGB(r:int,g:int,b:int):int {
			var rgb:int = parseInt((r*colorMultiplier).toString(16) + (g*colorMultiplier).toString(16) + (b*colorMultiplier).toString(16),16);
			return rgb;
		}
			
	}
}

Feel free to use and modify the code to your heart’s content. If you come up with anything nifty, post a link to it in the comments.

Posted in ProgrammingTagged Flash, math, procedural art comment on 3D Langton’s Ant, in Actionscript 3 Using Away3d

Langton’s Ant in 3d, Using Javascript and Three.js

2012-03-02 John Winkelman

Langton's Ant in 3d, using Javascript and Three.js

Click the screenshot to launch the demo. You will need to use the latest version of Chrome, Firefox or Safari if you want to see it running.

This is a re-creation of a Flash experiment from several years ago. Back before I started playing around with 3d, I created a series of experiments exploring cellular automata, the majority of which were variations on the Langton’s Ant algorithm. The most advanced version was one in pseudo-3d, and that was the last for over three years. Now with the advent of easy-to-use 3d libraries (like Three.js, used here), and the option of hardware acceleration to allow for complex animations, I felt it was time to re-visit some of the old experiments.

Here is the source code for the 3d ant:

window.requestAnimFrame = (function(){
	return  window.requestAnimationFrame	|| 
		window.webkitRequestAnimationFrame || 
		window.mozRequestAnimationFrame    || 
		window.oRequestAnimationFrame      || 
		window.msRequestAnimationFrame     || 
		function( callback ){
			window.setTimeout(callback, 1000 / 60);
		};
})();

var canvas,
	stage,
	container,
	scene,
	camera,
	renderer,
	projector,
	light;
	
var WIDTH = 640,
	HEIGHT = 640;
	VIEW_ANGLE = 45,
	ASPECT = WIDTH/HEIGHT,
	NEAR = .1,
	FAR = 10000,
	centerX = 0,
	centerY = 0,
	centerZ = 0,
	cameraX = 0,
	cameraY = 200,
	cameraZ = 400;
	
var antX = 32,
	antY = 32,
	antZ = 32,
	nextX,
	nextY,
	nextZ,
	cellsX = 64,
	cellsY = 64,
	cellsZ = 64,
	cellWidth = 8,
	cellHeight = 8,
	cellDepth = 8,
	antSize = 7,
	maxDirections = 8,
	colorMultiplier = Math.round(256/cellsX),
	xOff = cellsX/2*cellWidth,
	yOff = cellsY/2*cellHeight,
	zOff = cellsZ/2*cellDepth,
	base,
	objects,
	antDirection = 1,
	filledCells=0,
	
	isRotating=true,
	isPaused=false;
	
	function init() {
		canvas = document.getElementById("myCanvas");
		scene = new THREE.Scene();
		camera = new THREE.PerspectiveCamera( VIEW_ANGLE, ASPECT, NEAR, FAR );
		camera.position.x = cameraX;
		camera.position.y = cameraY;
		camera.position.z = cameraZ;
		camera.lookAt(scene.position);
		scene.add( camera );
		projector = new THREE.Projector();
		renderer = new THREE.WebGLRenderer( { antialias: true } );
		renderer.setSize( WIDTH, HEIGHT );
		light = new THREE.SpotLight();
		light.position.set( cameraX, cameraY, cameraZ );
		scene.add(light);
		canvas.appendChild( renderer.domElement );
		renderer.render(scene,camera);
		
		base = new THREE.Object3D();
		base.position.x = centerX;
		base.position.y = centerY;
		base.position.x = centerZ;
		base.rotation.y = 45;
		scene.add(base);
		camera.lookAt(base.position);
		objects = new Array(cellsX);
		for(var i=0;i<objects.length;i++) {
			objects[i] = new Array(cellsY);
			for(var j=0;j<objects[i].length;j++) {
				objects[i][j] = new Array(cellsZ);
			}
		}
		onEnterFrame();
	}
	
	function onEnterFrame() {
		requestAnimFrame(onEnterFrame);
		renderer.render(scene,camera);
		if(isPaused==true) return;
		if(!objects[antX][antY][antZ]) {
			antDirection++;
			if(antDirection == maxDirections) antDirection = 0;
			addObject(antX,antY,antZ);
		} else {
			removeObject(antX,antY,antZ);
			antDirection--;
			if(antDirection == -1) antDirection = maxDirections-1;
		}
		switch(antDirection) {
			case 0:
				antZ--;
				break;
			case 1:
				antX++;
				break;
			case 2:
				antY++;
				break;
			case 3:
				antX--;
				break;
			case 4:
				antZ++;
				break;
			case 5:
				antX++;
				break;
			case 6:
				antY--;
				break;
			case 7:
				antX--;
				break;
			default:
				break;
		}
		if(antY < 0) antY += cellsY;
		if(antY >= cellsY) antY -= cellsY;
		if(antX < 0) antX += cellsX;
		if(antX >= cellsX) antX -= cellsX;
		if(antZ < 0) antZ += cellsZ;
		if(antZ >= cellsZ) antZ -= cellsZ;
		if(isRotating==true) base.rotation.y +=.01;
		document.getElementById("count").value = filledCells;
	}
	function addObject(x,y,z) {
		var sphereMaterial = new THREE.MeshPhongMaterial({
			color: getRGB(x,y,z),
			opacity:1
		});	
		var obj = new THREE.Mesh(
		   new THREE.CubeGeometry(antSize,antSize,antSize),
		   sphereMaterial);
		obj.position.x = x*cellWidth-xOff;
		obj.position.y = y*cellHeight-yOff;
		obj.position.z = z*cellDepth-zOff;
		obj.overdraw = true;
		base.add(obj);
		objects[x][y][z] = obj;
		filledCells++;
	}
	function removeObject(x,y,z) {
		base.remove(objects[x][y][z]);
		objects[x][y][z] = null;
		filledCells--;
	}
	function getRGB(r,g,b) {
		var rgb = parseInt((r*colorMultiplier).toString(16) + (g*colorMultiplier).toString(16) + (b*colorMultiplier).toString(16),16);
		return rgb;
	}
	onload=init;

The above code assumes you have downloaded a copy of Three.js and have a HTML page with appropriate elements set up. To see the entirety of the code I used, right-click on the screenshot and open it in a new tab or window, then view source. It’s all one file, other than the Three.js library. Feel free to copy it in its entirety and play around.

Posted in ProgrammingTagged math, procedural art comment on Langton’s Ant in 3d, Using Javascript and Three.js

Speaking of Three.js

2012-02-26 John Winkelman

Trigonometry experiment using Three.js

Click the above image to see a recreation of a previous Flash experiment (source code here), using Three.js. And see below for the source code used to create this thing.

// shim layer with setTimeout fallback set to 60 frames per second
window.requestAnimFrame = (function(){
	return  window.requestAnimationFrame	|| 
		window.webkitRequestAnimationFrame || 
		window.mozRequestAnimationFrame    || 
		window.oRequestAnimationFrame      || 
		window.msRequestAnimationFrame     || 
		function( callback ){
			window.setTimeout(callback, 1000 / 60);
		};
})();

var canvas,
	stage,
	container,
	scene,
	camera,
	renderer,
	projector,
	light;
	
var w = 800;
var h = 600;
var VIEW_ANGLE = 45;
var ASPECT = w/h;
var NEAR = .1;
var FAR = 10000;
var centerX = 0;
var centerY = 0;
var centerZ = 0;
var radius = 175;
var cameraRadius = 1000;
var cameraX = cameraRadius;
var cameraY = cameraRadius;
var cameraZ = cameraRadius;
var theta = 0;
var group;
var objects = [];
var numObjects = 0;
var orbitSteps = 1000;
var orbitSpeed = Math.PI*2/orbitSteps;
var objectInterval;
var objectPosition;
var direction = 1;
var index = 0;
var startingObjects = 400;

onload = init;
function init() {
	canvas = document.getElementById("myCanvas");
	scene = new THREE.Scene();
	camera = new THREE.PerspectiveCamera( VIEW_ANGLE, ASPECT, NEAR, FAR );
	camera.position.x = cameraX;
	camera.position.y = cameraY;
	camera.position.z = cameraZ;
	camera.lookAt(scene.position);
	scene.add( camera );
	projector = new THREE.Projector();
	renderer = new THREE.WebGLRenderer( { antialias: true } );
	renderer.setSize( w, h );
	light = new THREE.SpotLight();
	light.position.set( centerX, centerY, 160 );
	scene.add(light);
	canvas.appendChild( renderer.domElement );
	renderer.render(scene,camera);
	initObjects();
	onEnterFrame();
}
function initObjects() {
	group = new THREE.Object3D();
	group.position.x = centerX;
	group.position.y = centerY;
	group.position.x = centerZ;
	for(var i=0;i<startingObjects;i++) {
		addObject();
	}
	scene.add(group);
}
function addObject() {
	var sphereMaterial = new THREE.MeshLambertMaterial({
		color: Math.round(Math.random()*0xffffff)
	});	
	var obj = new THREE.Mesh(
	   new THREE.SphereGeometry(8,8,8),	//	radius,segments,rings
	   sphereMaterial);
	obj.position.x = 0;
	obj.position.y = 0;
	obj.position.z = 0;
	obj.overdraw = true;
	group.add(obj);
	objects.push(obj);
	numObjects = objects.length;
	objectInterval = orbitSteps/numObjects;
}
function onEnterFrame() {
	requestAnimFrame(onEnterFrame);
	renderer.render(scene,camera);
	for(var i = 0; i < numObjects; i++) {
		objectPosition = orbitSpeed*objectInterval*i;    //    each object is individually updated
		objects[i].position.x = radius * (Math.cos(theta + objectPosition) * (Math.pow(5,Math.cos(theta+objectPosition)) - 2 * Math.cos(4 * (theta+objectPosition)) - Math.pow(Math.sin((theta+objectPosition)/12),4)));
		objects[i].position.y = radius * (Math.sin(theta + objectPosition) * (Math.pow(5,Math.cos(theta+objectPosition)) - 2 * Math.cos(4 * (theta+objectPosition)) - Math.pow(Math.sin((theta+objectPosition)/12),4)));
		objects[i].position.z = centerZ + radius * Math.sin(theta + objectPosition) - radius*1*(Math.sin((radius/radius + 3) * (theta + objectPosition)));
	}
	group.rotation.x += .002;
	group.rotation.y += .004;
	group.rotation.z += .008;
	theta += (orbitSpeed*direction);
}


Posted in ProgrammingTagged math, procedural art comment on Speaking of Three.js

HTML5 Canvas Drawing Library Exploration: Three.js

2012-02-15 John Winkelman

This is the sixth in an ongoing series of posts exploring various Javascript drawing libraries.

Three.js is a powerful 3d drawing library, and currently the one to beat when it comes to leveraging the latest browser capabilities. When available, it can tie in to the WebGL rendering engine (current browsers on fairly new computers) for an experience which is very close to what you would get from a native application. This demo is not that ambitious, but it should give you a basic idea of how to get started building interactive 3d applications in Javascript.

Click here to launch the demo. Give it a couple of moments to load; the Three.js library is over 300kb.

HTML

<!DOCTYPE html>
<html>
	<head>
		<title>Trigonometron built using Three.js</title>
		<style>
			* {margin:0;padding:0;}
			body {background:#ffffff;}
			#myCanvas {width:800px;height:480px;position:absolute;left:0;top:0;background:#ffffff;}
		</style>
		<script type="text/javascript" src="Three.js"></script>
	</head>
	<body>
		<div id="myCanvas"></div>
		<script type="text/javascript">
			//	Javascript goes here
		</script>
	</body>
</html>

Fairly basic stuff here. Note that the container for the app is a <div/> element, not a <canvas/> element. Now on to the good bits.

Javascript

// shim layer with setTimeout fallback set to 60 frames per second
window.requestAnimFrame = (function(){
	return  window.requestAnimationFrame	|| 
		window.webkitRequestAnimationFrame || 
		window.mozRequestAnimationFrame    || 
		window.oRequestAnimationFrame      || 
		window.msRequestAnimationFrame     || 
		function( callback ){
			window.setTimeout(callback, 1000 / 60);
		};
})();

var canvas,
	stage,
	container,
	scene,
	camera,
	renderer,
	projector,
	light,
	
	currentShape="circle",
	isPaused = true,
	isInitialized = false,
	currentHoverTarget = null;


var shapes = ["circle","tricuspoid","tetracuspoid","epicycloid","epicycloid 2","epicycloid 3","lissajous","lemniscate","butterfly"];
var w = 800;
var h = 480;
var VIEW_ANGLE = 45;
var ASPECT = w/h;
var NEAR = .1;
var FAR = 10000;
var centerX = -100;
var centerY = 0;
var centerZ = -150;
var radius_x = 175;
var radius_y = 175;
var radius_z = 175;
var theta = 0;
var objects = [];
var buttons = [];
var numObjects = 0;
var r2d = 180/Math.PI;
var d2r = Math.PI/180;
var orbitSteps = 240;
var orbitSpeed = Math.PI*2/orbitSteps;
var objectInterval;
var objectPosition;
var direction = 1;
var index = 0;
var xVar1 = 0;
var xVar2;
var xVar3;
var xVar4;
var startingObjects = 100;
var newX;
var newY;
var newZ = centerZ;


function init() {
	canvas = document.getElementById("myCanvas");
	scene = new THREE.Scene();
	camera = new THREE.PerspectiveCamera( VIEW_ANGLE, ASPECT, NEAR, FAR );
	camera.position.y = 0;
	camera.position.z = 500;
	scene.add( camera );
	projector = new THREE.Projector();
	renderer = new THREE.WebGLRenderer( { antialias: true } );
	renderer.setSize( w, h );
	light = new THREE.SpotLight();
	light.position.set( centerX, centerY, 160 );
	scene.add(light);
	canvas.appendChild( renderer.domElement );
	renderer.render(scene,camera);
	canvas.addEventListener( 'mousedown', onDocumentMouseDown, false );
	canvas.addEventListener( 'mousemove', onDocumentMouseMove, false );
	
	initInterface();
	initObjects();
	onEnterFrame();
	isInitialized = true;
}
onload = init;


function initInterface() {
	var xOff = 310;
	var yOff = 150;
	var zOff = -100;
	for(var i=0;i<shapes.length;i++) {
		buildTextButton(shapes[i],xOff,yOff,zOff,120,20,15);
		yOff -= 23;
	}
	yOff -= 23;
	buildTextButton("play/pause",xOff,yOff,zOff,120,20,15);

}
function buildTextButton(text,bX,bY,bZ,bW,bH,bD) {
	var materials = [];
	var co = 0xededed;
	for ( var j = 0; j < 6; j ++ ) {
		materials.push(new THREE.MeshLambertMaterial({color:co,opacity:1}));
	}
	var ctx = document.createElement('canvas');
	ctx.getContext('2d').font = '12px Courier,monospace';
	ctx.getContext('2d').fillStyle = '#000000';
	ctx.getContext('2d').textAlign="center";
	ctx.getContext('2d').fillText(text, 125,10);
	var tex = new THREE.Texture(ctx);
	tex.needsUpdate = true;
	var mat = new THREE.MeshBasicMaterial({map: tex});
	mat.transparent = true;
	var textRender = new THREE.Mesh(
		new THREE.PlaneGeometry(ctx.width, ctx.height),
		mat
	);
	textRender.doubleSided = true;
	textRender.position.x = bX+25;
	textRender.position.y = bY-70;
	textRender.position.z = bZ+8;
	scene.add(textRender);
	var c = new THREE.Mesh(
		new THREE.CubeGeometry(bW,bH,bD, 1, 1, 1,materials ),
		new THREE.MeshFaceMaterial()
	);

	c.position.x = bX;
	c.position.y = bY;
	c.position.z = bZ;
	c.overdraw = true;
	c.name = text;
	scene.add(c);
	buttons.push(c);
}
function initObjects() {
	for(var i=0;i<startingObjects;i++) {
		addObject();
	}
}
function addObject() {
	var sphereMaterial = new THREE.MeshLambertMaterial({
		color: Math.round(Math.random()*0xffffff)
	});	
	var obj = new THREE.Mesh(
	   new THREE.SphereGeometry(10,16,16),	//	radius,segments,rings
	   sphereMaterial);

	obj.position.x = centerX
	obj.position.y = centerY
	obj.position.z = centerZ;
	obj.overdraw = true;
	scene.add(obj);
	objects.push(obj);
	numObjects = objects.length;
	objectInterval = orbitSteps/numObjects;
}

function onEnterFrame() {
	requestAnimFrame(onEnterFrame);
	renderer.render(scene,camera);
	if(isPaused==true && isInitialized==true) return;
	for(var i = 0; i < numObjects; i++) {
		objectPosition = orbitSpeed*objectInterval*i;    //    each object is individually updated
		switch(currentShape) {
			case "circle":
				newX = centerX + radius_x * Math.cos(theta + objectPosition);
				newY = centerY + radius_y * Math.sin(theta + objectPosition);
				break;
			case "tricuspoid":
				newX = centerX + (radius_x*.5) * ((2 * Math.cos(theta + objectPosition)) + Math.cos(2 * (theta + objectPosition)));
				newY = centerY + (radius_y*.5) * ((2 * Math.sin(theta + objectPosition)) - Math.sin(2 * (theta + objectPosition)));
				break;
			case "tetracuspoid":
				newX = centerX + radius_x * Math.pow((Math.cos(theta + objectPosition)),3);
				newY = centerY + radius_y * Math.pow((Math.sin(theta + objectPosition)),3);
				break;
			case "epicycloid":
				newX = centerX + (radius_x*.4) * Math.cos(theta + objectPosition) - radius_x*1*(Math.cos((radius_x/radius_x + 1) * (theta + objectPosition)));
				newY = centerY + (radius_y*.4) * Math.sin(theta + objectPosition) - radius_y*1*(Math.sin((radius_y/radius_y + 1) * (theta + objectPosition)));
				break;
			case "epicycloid 2":
				newX = centerX + (radius_x*.4) * Math.cos(theta + objectPosition) - radius_x*1*(Math.cos((radius_x/radius_x + 2) * (theta + objectPosition)));
				newY = centerY + (radius_y*.4) * Math.sin(theta + objectPosition) - radius_y*1*(Math.sin((radius_y/radius_y + 2) * (theta + objectPosition)));
				break;
			case "epicycloid 3":
				newX = centerX + (radius_x*.4) * Math.cos(theta + objectPosition) - radius_x*1*(Math.cos((radius_x/radius_x + 3) * (theta + objectPosition)));
				newY = centerY + (radius_y*.4) * Math.sin(theta + objectPosition) - radius_y*1*(Math.sin((radius_y/radius_y + 3) * (theta + objectPosition)));
				break;
			case "lissajous":
				newX = centerX + radius_x * (Math.sin(3 * (theta + objectPosition) + xVar1));
				newY = centerY + radius_y * Math.sin(theta + objectPosition);
				xVar1 += .0005;
				break;
			case "lemniscate":
				newX = centerX + (radius_x*1.2) * ((Math.cos(theta + objectPosition)/(1 + Math.pow(Math.sin(theta + objectPosition),2))));
				newY = centerY + (radius_y*1.2) * (Math.sin(theta + objectPosition) * (Math.cos(theta + objectPosition)/(1 + Math.pow(Math.sin(theta + objectPosition),2))));
				break;
			case "butterfly":
				newX = centerX + (radius_x*.4) * (Math.cos(theta + objectPosition) * (Math.pow(5,Math.cos(theta+objectPosition)) - 2 * Math.cos(4 * (theta+objectPosition)) - Math.pow(Math.sin((theta+objectPosition)/12),4)));
				newY = centerY + (radius_y*.4) * (Math.sin(theta + objectPosition) * (Math.pow(5,Math.cos(theta+objectPosition)) - 2 * Math.cos(4 * (theta+objectPosition)) - Math.pow(Math.sin((theta+objectPosition)/12),4)));
				break;
			default:
				break;
	
		}
		objects[i].position.x = newX;
		objects[i].position.y = newY;
	}
	theta += (orbitSpeed*direction);
}

function onDocumentMouseMove( event ) {
	var targetObj = getIntersectedObject(event);
	if(targetObj == null) {
		document.getElementById("myCanvas").style.cursor="default";
		if(currentHoverTarget != null) {
			setObjectColor(currentHoverTarget,0xededed);
			currentHoverTarget = null;
		}
	} else {
		document.getElementById("myCanvas").style.cursor="pointer";
		if(targetObj != currentHoverTarget && currentHoverTarget != null) {
			setObjectColor(currentHoverTarget,0xededed);
		}
		setObjectColor(targetObj,0xffffff);
		currentHoverTarget = targetObj;
	}
}

function setObjectColor(thing,c) {
	for(var i=0;i<6;i++) {
		thing.geometry.materials[i].color.setHex(c);
	}
}

function onDocumentMouseDown( event ) {
	var targetObj = getIntersectedObject(event);
	if(targetObj != null) {
		if(targetObj.name=="play/pause") {
			isPaused = !isPaused;
		} else {
			currentShape = targetObj.name;
		}
	}
}
function getIntersectedObject(event) {
	event.preventDefault();
	var mouseX, mouseY;
	if(event.offsetX) {
		mouseX = event.offsetX;
		mouseY = event.offsetY;
	}
	else if(event.layerX) {
		mouseX = event.layerX;
		mouseY = event.layerY;
	}
	var vector = new THREE.Vector3(
		(mouseX / w) * 2 - 1,
		-(mouseY / h) * 2 + 1,
		0.5
	);
	projector.unprojectVector( vector, camera );
	var ray = new THREE.Ray( camera.position, vector.subSelf( camera.position ).normalize() );
	var intersects = ray.intersectObjects( buttons );
	if ( intersects.length > 0 ) {
		return intersects[0].object;
	} else {
		return null;
	}
}

Here is a line-by-line breakdown of the code.

  • 1-11 – requestAnimFrame – this is a custom function which tries to take advantage of the built-in (for new browsers) requestAnimationFrame functionality, which is meant to be used for frame-based animations (like Adobe Flash uses). Each browser uses its own variations, so this function tries each one, and if it is in a browser which does not support the functionality, it defaults to a setTimeout call.
  • 13-25 – initialize global variables. The first eight – “canvas” to “light”, are used by the Three.js to create, control, and render the 3d scene to the canvas.
  • 29-61 – initialize variables for the animation. These are not specific to Three.js. Note, however, that there are now “z” variables in addition to “x” and “y”
  • 64-86 – init() – set up 3d environment and add all of the graphic elements
    • 65 – associate the app with an HTML element
    • 66 – create a new scene for display
    • 67-70 – initialize and position a camera, relative to the scene. The camera is the “screen” through which you look at the scene
    • 71 – create a new projector
    • 72-73 – initialize the renderer, which controls how the app will be drawn to the screen. In tthe his instance, we will use the WebGL renderer
    • 74-76 – create a new light source for the scene
    • 77 – add the newly created renderer to the HTML DOM
    • 78 – draw the app to the screen
    • 79-80 – add mouse listeners
    • 82 – create the UI buttons
    • 83 – create the graphics for the animations
    • 84 – call the animation once to display everything to the screen
    • 85 – we are now initialized and ready to go
  • 87 – tell the browser to call the init() method as soon as the page finishes loading
  • 90-101 – initInterface() – create the UI elements for the app
    • 91-93 – set the initial x, y, and z positions for the UI buttons
    • 94-97 – create one text button for each element in the shapes[] array
    • 98 – add some space between the shape buttons and the play/pause button
    • 99 – create the play/pause button
  • 102-138 – buildTextButton() – create a 3d rectangle button, add text to one face, and position it on the screen
    • 103 – initialize the materials array
    • 104 – set the default color of the buttons
    • 105-107 – create a new Lambert Material for each face of the cube. Lambert materials can be lit by spotlights and cast shadows. Normal materials cannot.
    • 108-112 – create a new canvas element, add text to it, and style the text
    • 113-114 – copy the canvas element to a Texture
    • 115-116 – draw the texture to a Material
    • 117-125 – create a new display object, fill it with the Material, and position it in 3d space. In this case, it will have the same x and y coordinates as the gray box behind it, but will hover one “pixel” from the front face of the box. I am sure there are ways to draw the text directly to the face of a cube, but I have not yet discovered it. This is a hack.
    • 126-135 – create a cube display object, color it in with the materials array, and position it in 3d space
    • 136 – add the cube display object to the display list
    • 137 – add the cube to the array of buttons. This is for determining mouse interactions
  • 139-143 – initObjects() – create a number of graphic element for the animations, equal to the value of startingObjects
  • 144-160 – addObject() – create a new display object for the animations
    • 145-147 – create a new material and give it a random color
    • 148-150 – create a new Sphere display object
    • 152-154 – position the object in 3d space
    • 155 – set the material on top of the wireframe of the model, so the “edges” don’t show through
    • 156 – add the Sphere to the display list
    • 157 – add a reference to the Sphere to the array of spheres. Used for animations
    • 158-159 – update global variables to correctly set spacing of objects within the animations
  • 162-214 – onEnterFrame() – update the animation by one step
    • 163 – advance everything by one frame
    • 164 – draw everything to the screen
    • 165 – if the app is finished initializing, but is paused, do nothing
    • 166-212 – cycle through each Sphere display object in the animation and update its position on the screen. Note that this app only updates the Spheres in the x and y planes; z remains constant.
    • 213 – update the progress of the animation as a whole
  • 216-232 – onDocumentMouseMove() – called whenever the mouse is moved in the app; used to determine which button is currently being moused over
    • 217 – call getIntersectedObject() to determan which (if any) of the buttons is currently being moused over
    • 218-223 – if there is nothing being moused over…
      • 219 – set the cursor to the default
      • 220-223 – if there was an element being moused over in the last frame iterations…
        • 221 – call setObjectColor() to return the color of the rectangle to its default
        • 222 – set the currentHoverTarget to null
    • 224-231 – else if one of the buttons IS being moused over…
      • 225 – set the cursor to a pointer
      • 226-228 – if the current hover target is not the same as the one hovered over in the previous frame, yet SOMETHING was hovered over in the previous frame, set the previous target’s color to the default
      • 229 – set the color of the current target to the hover highlight color
      • 230 – set the global currentHoverTarget to equal the button which is currently being hovered over
  • 234-238 – setObjectColor() – cycle through the six faces of a button and set each face to the appropriate color
  • 240-249 – onDocumentMouseDown() – called whenever the mouse button is pressed within the app
    • 241 – find out which button, if any, was clicked
    • 242-248 – if a button was clicked on…
      • 243-244 – if it was the play/pause button, toggle the pause variable
      • 245-247 – if it was any other button, set the currentShape variable to the sppropriate value
  • 250-275 – getIntersectedObject() – determine if a mouse event happened where it might intersect a target display object
    • 251 – stop the mouse event from cascading through the rest of the DOM
    • 252 – declare coordinate variables
    • 253-260 – based on how the browser handles mouse events, determine where on the app the event occurred
    • 261-265 – create a new vector object based on the x, y, and z coordinates of the event within the app
    • 266-267 – calculate where the objects in 3d space intersect the screen (the camera) in 2d space
    • 268 – build an array of every object in the buttons[] array which intersects the mouse event
    • 269-270 – if there is more than 0 elements in this array, return the first (top) display object
    • 271-273 – if nothing is intersected, do nothing

So there you have it: The trigonometron in 3d. Well, 3d-ish. It exists in 3d space, but everything is on the same plane, so I suppose it is de-facto 2d. I have a couple of 3d demos which I will post in the next few days. All in all, figuring out the 3d stuff was less difficult than I thought it would be. My experiments last fall with Away3d and Flash certainly helped.

This will be the last library exploration for a while. Further posts will must likely be experiments using Three.js, or one of the other libraries I explored in this series of posts.

In case you missed them the previous posts in the series are here:

  • Easel.js
  • oCanvas.js
  • Raphael.js
  • Paper.js
  • Processing.js
Posted in ProgrammingTagged math, procedural art comment on HTML5 Canvas Drawing Library Exploration: Three.js

HTML5 Canvas Drawing Library Exploration: Processing.js

2012-02-13 John Winkelman

This is the fifth in a loose series of articles exploring some of the Javascript drawing libraries currently freely available to developers.

Today I will be experimenting with Processing.js, which is a radical departure from the previous libraries in this series.

Processing.js started out as Processing, a Java graphics library/custom language which can trace its origins back to the year 2001 and the big brains of Casey Reas and Ben Fry at the MIT Media Lab. When I first discovered Flash, my quest for source code and examples repeatedly brought me in contact with Proce55ing (as it was called back then). Many of my early coding experiments revolved around trying to re-create in Flash that which had been so wonderfully demonstrated in Java.

And now almost everything which has been done in Java can now be done in Javascript, with little change to the original source code. That’s right – Processing.js can use the same Processing code that the Java version uses.

Click here to launch the demo. Give it a moment; the Processing.js library is over 200kb.

HTML

<!DOCTYPE html>
<html>
	<head>
		<title>Trigonometron in Processing.js</title>
		<style>
			* {margin:0;padding:0;}
			body {background:#ffffff;}
			#myCanvas {width:800px;height:480px;position:absolute;left:0;top:0;}
		</style>
		<script type="text/javascript" src="processing-1.3.6.min_.js"></script>
	</head>
	<body>
		<canvas id="myCanvas" data-processing-sources="/path/to/trigonometron.pde"></canvas>
	</body>
</html>

Nothing too exciting here. The Processing.js library is loaded in the <head/> element. The <canvas/> tag has a custom attribute, “data-processing-sources”. The value for this attribute should be the path – relative or absolute – to the Processing source file (*.pde) used in this app.

Processing code

String currentShape="circle";
boolean isPaused = false;
boolean isInitialized = false;


String[] shapes = {"circle","tricuspoid","tetracuspoid","epicycloid","epicycloid 2","epicycloid 3","lissajous","lemniscate","butterfly"};
int w = 800;
int h = 480;
int centerX = 240;
int centerY = 240;
int radius_x = 150;
int radius_y = 150;
int theta = 0;
ArrayList objects;
ArrayList buttons;
int numObjects = 0;
float r2d = 180/PI;
float d2r = PI/180;
int orbitSteps = 180;
float orbitSpeed = PI*2/orbitSteps;
float objectInterval;
float objectPosition;
int direction = 1;
int index = 0;
int xVar1 = 0;
int xVar2;
int xVar3;
int xVar4;
int startingObjects = 100;
float newX;
float newY;

PFont buttonFont;

void setup(){
	size(800,480);
	background(255,255,255);
	fill(30);
	PFont buttonFont = loadFont("courier");
	textFont(buttonFont,14);
	textAlign(CENTER);
	objects = new ArrayList();
	buttons = new ArrayList();
	initInterface();
	initObjects();
	frameRate(32);
}

void initObjects() {
	for(int i=0;i<startingObjects;i++) {
		addObject();
	}
}
void addObject() {
	objects.add(new CircleObject(centerX,centerY,10,10));
	numObjects = objects.size();
	objectInterval = orbitSteps/numObjects;
}

void initInterface() {
	int xOff = 625;
	int yOff = 25;
	for(int i=0;i<shapes.length;i++) {
		buttons.add(new TextButton(xOff,yOff,150,20,shapes[i]));
		yOff += 23;
	}
	yOff += 23;
	buttons.add(new TextButton(xOff,yOff,150,20,"PLAY/PAUSE"));
}
void draw() {
	if(isPaused==true) return;
	background(255,255,255);
	for(int i=0;i<numObjects;i++) {
		objectPosition = orbitSpeed*objectInterval*i;
		switch(currentShape) {
			case "circle":
				newX = centerX + radius_x * cos(theta + objectPosition);
				newY = centerY + radius_y * sin(theta + objectPosition);
				break;
			case "tricuspoid":
				newX = centerX + (radius_x*.5) * ((2 * cos(theta + objectPosition)) + cos(2 * (theta + objectPosition)));
				newY = centerY + (radius_y*.5) * ((2 * sin(theta + objectPosition)) - sin(2 * (theta + objectPosition)));
				break;
			case "tetracuspoid":
				newX = centerX + radius_x * pow((cos(theta + objectPosition)),3);
				newY = centerY + radius_y * pow((sin(theta + objectPosition)),3);
				break;
			case "epicycloid":
				newX = centerX + (radius_x*.4) * cos(theta + objectPosition) - radius_x*1*(cos((radius_x/radius_x + 1) * (theta + objectPosition)));
				newY = centerY + (radius_y*.4) * sin(theta + objectPosition) - radius_y*1*(sin((radius_y/radius_y + 1) * (theta + objectPosition)));
				break;
			case "epicycloid 2":
				newX = centerX + (radius_x*.4) * cos(theta + objectPosition) - radius_x*1*(cos((radius_x/radius_x + 2) * (theta + objectPosition)));
				newY = centerY + (radius_y*.4) * sin(theta + objectPosition) - radius_y*1*(sin((radius_y/radius_y + 2) * (theta + objectPosition)));
				break;
			case "epicycloid 3":
				newX = centerX + (radius_x*.4) * cos(theta + objectPosition) - radius_x*1*(cos((radius_x/radius_x + 3) * (theta + objectPosition)));
				newY = centerY + (radius_y*.4) * sin(theta + objectPosition) - radius_y*1*(sin((radius_y/radius_y + 3) * (theta + objectPosition)));
				break;
			case "lissajous":
				newX = centerX + radius_x * (sin(3 * (theta + objectPosition) + xVar1));
				newY = centerY + radius_y * sin(theta + objectPosition);
				xVar1 += .002;
				break;
			case "lemniscate":
				newX = centerX + (radius_x*1.2) * ((cos(theta + objectPosition)/(1 + pow(sin(theta + objectPosition),2))));
				newY = centerY + (radius_y*1.2) * (sin(theta + objectPosition) * (cos(theta + objectPosition)/(1 + pow(sin(theta + objectPosition),2))));
				break;
			case "butterfly":
				newX = centerX + (radius_x*.4) * (cos(theta + objectPosition) * (pow(5,cos(theta+objectPosition)) - 2 * cos(4 * (theta+objectPosition)) - pow(sin((theta+objectPosition)/12),4)));
				newY = centerY + (radius_y*.4) * (sin(theta + objectPosition) * (pow(5,cos(theta+objectPosition)) - 2 * cos(4 * (theta+objectPosition)) - pow(sin((theta+objectPosition)/12),4)));
				break;
			default:
				break;
	
		}
		objects.get(i).updatePosition(newX,newY);
	}
	theta += (orbitSpeed*direction);
	
	for(int j = 0;j<buttons.size();j++) {
		buttons.get(j).drawMe();
	}
}

void mouseClicked() {
	for(int i=0;i<buttons.size();i++) {
		buttons.get(i).onClick(mouseX,mouseY);
	}
}
void mouseMoved() {
	for(int i=0;i<buttons.size();i++) {
		buttons.get(i).onHover(mouseX,mouseY);
	}
}

class CircleObject {
	float x,y,d;
	int colorR,colorG,colorB;
	CircleObject(cX,cY,cW,cH) {
		x = cX;
		y = cY;
		w = cW;
		h = cH;
		colorR = random(255);
		colorG = random(255);
		colorB = random(255);
		drawMe();
	}
	void updatePosition(nX,nY) {
		x = nX;
		y = nY;
		drawMe();
	}
	void drawMe() {
		fill(colorR,colorG,colorB);
		stroke(128,128,128);
		ellipse(x,y,w,h);
	}
}

class TextButton {
	int x, y, w, h;
	string btnTxt;
	int overGray = 255;
	int offGray = 238;
	int currentGray = offGray;
	TextButton(int cX,int cY,int cW,int cH,string tx) {
		x = cX;
		y = cY;
		w = cW;
		h = cH;
		btnTxt = tx;
		drawMe();
	}
	void onClick(int mX,int mY) {
		if(mX>x && mY>y && mX < (x+w) && mY < (y+h)) {
			if(btnTxt=="PLAY/PAUSE"){
				isPaused = !isPaused;
			} else {
				currentShape = btnTxt;
			} 
		}
	}
	void onHover(int mX,int mY) {
		if(mX>x && mY>y && mX < (x+w) && mY < (y+h)) {
			cursor(HAND);
			currentGray = overGray;
		} else {
			cursor(ARROW);
			currentGray = offGray;
		}
	}
	void drawMe() {
		stroke(128,128,128);
		fill(currentGray,currentGray,currentGray);
		rect(x,y,w,h);
		fill(0,0,0);
		text(btnTxt,x,y+5,w,h);
	}
}

And here is where things become radically different from the previous examples. This is Processing script, which is essentially a custom, simplified version of Java. There is a lot going on here; more than with any of the previous examples. I will be going into extra detail in the following section.

  • 1-3 – instantiate global variables
  • 6-31 – instantiate variables specific to the animation. Note the different syntax used here – int, float, ArrayList, String, rather than simply declaring “var x = y”.
  • 33 – declare a variable to hold the font for the buttons
  • 35-47 – setup() – built-in Processing method. This is where the environment is set up, variables are initialized, and any external assets are referenced
    • 36 – set the width and height of the app
    • 37-38 – set the color of the background and fill it in with an alpha value of 30% opaque
    • 39 – set the base font for the app
    • 40 – set the size of the base font
    • 41 – set the base text alignment
    • 42-43 instantiate the array lists which will hold the buttons for the UI and the objects for the animations
    • 44-45 call the methods which will create the UI buttons and the objects for the animations
    • 46 – set the frame rate of the app to 32 frames per second.
  • 49-53 – initObjects() – create a number of objects for the animations, equal to the value of the variable startingObjects
  • 54-58 – addObject() – create a circle graphic for the animations
    • 55 – create an instance of the CircleObject class, and add it to the objects ArrayList
    • 56 – update the numObjects variable to equal the length of the objects ArrayList
    • 57 – adjust the spacing of the circle graphics in the animations, based on the number of circles
  • 60-69 – initInterface() – create and position the user interface buttons
    • 61-62 set the base X and Y positions for the buttons in the UI
    • 63-66 – create one TextButton instance for each element in the shapes array
    • 67 – increment the Y position for the play/pause button
    • 68 – create a TextButton instance for the play/pause button
  • 70-124 draw() – built-in Processing method. This is where the various objects are drawn on the screen. If the frameRate is set, then this method is called frameRate() times per second (see line 46).
    • 71 – if the animation is paused, do nothing
    • 72 – fill in the canvas with white
    • 73-119 cycle through and update the positions of each object in the animation
      • 74 – get the base position of one of the instances of the circle graphics
      • 75-116 – based on the current value of currentShape, find the new x/y position for the object
      • 117 – call the updatePosition() method of the object, and feed it the new x/y coordinates
    • 119 – update the rotation of the animation
    • 121-123 – iterate through the UI buttons and re-draw them to the screen
  • 126-130 – mouseClicked() – built-in Processing method. Called whenever a mouse click is detected in the app
    • 127-129 – cycle through all of the UI buttons and call the onClick() method of each, using the mouse X and Y coordinates as arguments.
  • 131-135 – mouseMoved() – built-in Processing method. Called whenever the mouse changes position in the app
    • 132-134 – cycle through all of the UI buttons and call the onHover() method of each, using the mouse X and Y coordinates as arguments.
  • 137-160 – class CircleObject{} – contains properties and methods of the circle graphics used to display the animations
    • 138-139 – initialize internal variables for this class
    • 140-149 – CircleObject() – constructor for creating instances of the CircleObject class. Also see line 55.
      • 141-144 – set internal variables to the arguments fed into the constructor
      • 145-147 – set random values for the red, green, and blue components of the fill color for this object
      • 148 – call the drawMe() method of this class
    • 150-154 – updatePosition() – changes the x and y position of this object
      • 151-152 – update the x and y variables in this object
      • 153 – call the drawMe() method to draw this object to the screen
    • 155-159 – drawMe() – method which draws the circle graphic to the screen. Also see lines 148 and 153
      • 156 – set the fill color of the circle graphic using the red, green, and blue values which were defined in the constructor
      • 157 – set the stroke color to medium gray
      • 158 – draw the circle (ellipse) to the screen
  • 162-201 – class TextButton{} – contains properties and methods for displaying UI buttons and handling mouse interactions
    • 163-167 – initialize internal variables for this class
    • 168-175 – TextButton() – constructor method for creating instances of the TextButton class. Also see lines 64 and 68
      • 169-173 set the values of the internal variables
      • 174 – call the drawMe() method of this class to draw an instance of this button to the screen
    • 176-184 – onClick() – check to see if the mouse was over this instance when it was clicked
      • 177-183 – check to see if the mouse x and y coordinates fall within the x/y and width/height area of this button
        • 178-179 – if this is the play/pause button, toggle the “isPaused” global variable
        • 180-183 – otherwise, set the global “currentShape” property to equal the value of this button
    • 185-193 – onHover() – check to see of the mouse was over this button instance when it moved
      • 186-188 – if the mouse x and y position was within the bounds of this button, set its background color to the hover color, and change the cursor to a hand
      • 189-192 – otherwise, set the background color to the default gray and change the cursor to an arrow
    • 194-200 – drawMe() – draw this instance of the button to the screen
      • 195 – set the stroke color to a medium gray
      • 196 – set the fill color for the background of this button
      • 197 – draw a gray rectangle
      • 198 – set the text color to black
      • 199 – draw the text for this button to the screen

And there it is. Probably the most complex code in this series. This is why libraries like Easel and oCanvas are so nice for simpler applications – they take all of the hassle out of creating UI elements.

Processing.js is a very big gun as far as drawing libraries go. It is perhaps not the best one to use for basic UI work, but if you have something which requires serious visualization power, such as representations of complex mathematics or scientific data, then this is the tool to use. It can easily interface with vanilla Javascript, so if you don’t want to go through the trouble of coding your own buttons, you can create the UI in plain HTML and use, say, jQuery to hook everything together.

As with the other articles in this series, the math for the animations comes from my Simple Trigonometric Curves Tutorial over at Kongregate.

Previous articles: Easel.js, oCanvas.js, Raphael.js, Paper.js.
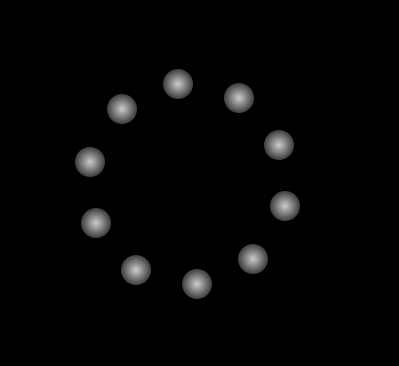
Posted in ProgrammingTagged math, procedural art comment on HTML5 Canvas Drawing Library Exploration: Processing.js

HTML5 Canvas Drawing Library Exploration: Paper.js

2012-02-09 John Winkelman

This is the fourth in an ongoing series of posts exploring some Javascript drawing libraries. Earlier posts cover Easel, oCanvas, and Raphael.

Paper.js is an interesting library. It is a Javascript port of the Scriptographer tool used in Adobe Illustrator, and much effort has been made to keep the code used in each tool interchangeable. It does a good job of opening the programming door for illustrators looking to create designs which, if created by hand, would be labor-intensive and/or complex to the point of being nearly impossible.

The code for Paper.js is a little more complex than in the previous libraries I have covered. Mouse interactions are a little more take a little more work to set up, and the number of drawing tools is quite large. Paper.js allows the creation of a custom DOM within the canvas element, and that makes it possible to create quite UI-intensive applications.

Click to Launch the demo.

HTML

<!DOCTYPE html>
<html>
	<head>
		<title>Paper.js demo</title>
		<style>
			* {margin:0;padding:0;}
			body {background:#ffffff;margin:0;padding:0;overflow:hidden;}
			#myCanvas {position:absolute;left:0;top:0;width:800px;height:480px;background:#ffffff;}
		</style>
		<script type="text/javascript" src="paper.js"></script>
	</head>
	<body>
		<canvas id="myCanvas" width="800" height="480"></canvas>
		<script type="text/paperscript" canvas="myCanvas">
			//	paperscript code goes here
		</script>
	</body>
</html>

The HTML is mostly identical to that used in the Easel and oCanvas demos, with one exception: Notice the <script/> element in the body. It has a custom type (“text/paperscript”), and a custom attribute (“canvas”), which are used by the Paper.js library to set up the page. Paperscript is simply Javascript with some additional properties and methods. It is possible to use Paper.js with pure Javascript, and the only difference would be some more verbose coding.

Javascript/Paperscript

/*	global variables	*/
var currentShape="circle";
var	isPaused = true;
var	isInitialized = false;
var buttons = [];
var pauseButton;

/*	math and positioning	*/
var shapes = ["circle","tricuspoid","tetracuspoid","epicycloid","epicycloid 2","epicycloid 3","lissajous","lemniscate","butterfly"];
var w = 800;
var h = 480;
var centerX = 240;
var centerY = 240;
var radius_x = 150;
var radius_y = 150;
var theta = 0;
var objects = [];
var numObjects = 0;
var r2d = 180/Math.PI;
var d2r = Math.PI/180;
var orbitSteps = 180;
var orbitSpeed = Math.PI*2/orbitSteps;
var objectInterval;
var objectPosition;
var direction = 1;
var index = 0;
var xVar1 = 0;
var xVar2 = 0;
var xVar3 = 0;
var xVar4 = 0;
var startingObjects = 100;
var newX;
var newY;

initInterface();
initObjects();
onFrame();
isInitialized = true;
function initInterface() {
	var xOff = 650;
	var yOff = 25;
	for(var i=0;i<shapes.length;i++) {
		var bGroup = new Group();
		var btn = new Rectangle(new Point(0,0),new Size(150,20));
		var btnPath = new Path.Rectangle(btn);
		btnPath.fillColor="#ededed";
		btnPath.strokeColor="#808080";
		btnPath.strokeWidth = 1;
		
		btnPath.shapeName = shapes[i];
		
		var txt = new PointText(new Point(75,12));
		txt.content = shapes[i];
		txt.characterStyle= {
			font:"Courier",
			fontSize:10,
			fillColor:"#000000"
		}
		txt.paragraphStyle = {
			justification:"center"
		};
		bGroup.addChild(btnPath);
		bGroup.addChild(txt);
		bGroup.position.x = xOff;
		bGroup.position.y = yOff;
		bGroup.value = shapes[i];
		buttons.push(btnPath);
		yOff += 23;
	}
	yOff += 23;
	
	var pauseButtonGroup = new Group();
	var pauseButtonRect = new Rectangle(new Point(0,0),new Size(150,20));
	pauseButton = new Path.Rectangle(pauseButtonRect);
	pauseButton.fillColor="#ededed";
	pauseButton.strokeColor="#808080";
	btnPath.strokeWidth = 1;
	var pauseButtonText = new PointText(new Point(75,12));
	pauseButtonText.content = "PLAY/PAUSE";
	pauseButtonText.characterStyle= {
		font:"Courier",
		fontSize:10,
		fillColor:"#000000"
	}
	pauseButtonText.paragraphStyle = {
		justification:"center"
	};
	pauseButtonGroup.addChild(pauseButton);
	pauseButtonGroup.addChild(pauseButtonText);
	pauseButtonGroup.position.x = xOff;
	pauseButtonGroup.position.y = yOff;
}

function initObjects() {
	for(var i=0;i<startingObjects;i++) {
		addObject();
	}
}
function addObject() {
	var obj = new Path.Circle(new Point(centerX,centerY),5);
	obj.style={
		fillColor:'#'+randomRGB()+randomRGB()+randomRGB(),
		strokeColor:'#000000'
	};
	objects.push(obj);
	numObjects = objects.length;
	objectInterval = orbitSteps/numObjects;
}
function removeObject() {
	numObjects = objects.length;
	objectInterval = orbitSteps/numObjects;
}

function randomRGB(){
	var s = Math.floor(Math.random()*256).toString(16);
	if(s.length==1) s = "0"+s;
	return s;
}


function onMouseDown(e) {
	for(var i=0;i<buttons.length;i++) {
		if(buttons[i].hitTest(e.point)) {
			currentShape = buttons[i].shapeName;
			isInitialized = false;
			onFrame();
			isInitialized = true;
		}
	}
	if(pauseButton.hitTest(e.point)) {
		isPaused = !isPaused;
	}
}
function onMouseMove(e) {
	for(var i=0;i<buttons.length;i++) {
		if(buttons[i].hitTest(e.point)) {
			buttons[i].fillColor="#ffffff";
		} else {
			buttons[i].fillColor="#ededed";
		}
	}
	if(pauseButton.hitTest(e.point)) {
		pauseButton.fillColor="#ffffff";
	} else {
		pauseButton.fillColor="#ededed";
	}
}

function onFrame(e) {
	if(isPaused==true && isInitialized==true) return;
	for(var i = 0; i < numObjects; i++) {
		objectPosition = orbitSpeed*objectInterval*i;    //    each object is individually updated
		switch(currentShape) {
			case "circle":
				newX = centerX + radius_x * Math.cos(theta + objectPosition);
				newY = centerY + radius_y * Math.sin(theta + objectPosition);
				break;
			case "tricuspoid":
				newX = centerX + (radius_x*.5) * ((2 * Math.cos(theta + objectPosition)) + Math.cos(2 * (theta + objectPosition)));
				newY = centerY + (radius_y*.5) * ((2 * Math.sin(theta + objectPosition)) - Math.sin(2 * (theta + objectPosition)));
				break;
			case "tetracuspoid":
				newX = centerX + radius_x * Math.pow((Math.cos(theta + objectPosition)),3);
				newY = centerY + radius_y * Math.pow((Math.sin(theta + objectPosition)),3);
				break;
			case "epicycloid":
				newX = centerX + (radius_x*.4) * Math.cos(theta + objectPosition) - radius_x*1*(Math.cos((radius_x/radius_x + 1) * (theta + objectPosition)));
				newY = centerY + (radius_y*.4) * Math.sin(theta + objectPosition) - radius_y*1*(Math.sin((radius_y/radius_y + 1) * (theta + objectPosition)));
				break;
			case "epicycloid 2":
				newX = centerX + (radius_x*.4) * Math.cos(theta + objectPosition) - radius_x*1*(Math.cos((radius_x/radius_x + 2) * (theta + objectPosition)));
				newY = centerY + (radius_y*.4) * Math.sin(theta + objectPosition) - radius_y*1*(Math.sin((radius_y/radius_y + 2) * (theta + objectPosition)));
				break;
			case "epicycloid 3":
				newX = centerX + (radius_x*.4) * Math.cos(theta + objectPosition) - radius_x*1*(Math.cos((radius_x/radius_x + 3) * (theta + objectPosition)));
				newY = centerY + (radius_y*.4) * Math.sin(theta + objectPosition) - radius_y*1*(Math.sin((radius_y/radius_y + 3) * (theta + objectPosition)));
				break;
			case "lissajous":
				newX = centerX + radius_x * (Math.sin(3 * (theta + objectPosition) + xVar1));
				newY = centerY + radius_y * Math.sin(theta + objectPosition);
				xVar1 += .002;
				break;
			case "lemniscate":
				newX = centerX + (radius_x*1.2) * ((Math.cos(theta + objectPosition)/(1 + Math.pow(Math.sin(theta + objectPosition),2))));
				newY = centerY + (radius_y*1.2) * (Math.sin(theta + objectPosition) * (Math.cos(theta + objectPosition)/(1 + Math.pow(Math.sin(theta + objectPosition),2))));
				break;
			case "butterfly":
				newX = centerX + (radius_x*.4) * (Math.cos(theta + objectPosition) * (Math.pow(5,Math.cos(theta+objectPosition)) - 2 * Math.cos(4 * (theta+objectPosition)) - Math.pow(Math.sin((theta+objectPosition)/12),4)));
				newY = centerY + (radius_y*.4) * (Math.sin(theta + objectPosition) * (Math.pow(5,Math.cos(theta+objectPosition)) - 2 * Math.cos(4 * (theta+objectPosition)) - Math.pow(Math.sin((theta+objectPosition)/12),4)));
				break;
			default:
				break;
	
		}
		objects[i].position.x = newX;
		objects[i].position.y = newY;
	}
	theta += (orbitSpeed*direction);
}

Here is a line-by-line breakdown of the above Paperscript:

  • 2-6 – initialize some global variables. Note that there is a “pauseButton” variable here. This will be important later.
  • 9-33 – instantiating variables for the trigonometry animations. Nothing here is Paper.js specific.
  • 35 – method call to create the user interface
  • 36 – method call to create the circle graphics used in the animation
  • 37 – display the initial pattern
  • 38 – set the state of the app to “initialized”
  • 39-92 – initInterface() – create the button used to control the animations
    • 40-41 – initialize variables for positioning the UI buttons
    • 42-69 – iterate through the shapes array and create a button for each element therein
      • 43 – create a Group object to hold the elements that make up a button
      • 44 – create a Rectangle object
      • 45 – create a display object to display the Rectangle on the stage
      • 46-48 – style the rectangle
      • 50 – associate the name of the associated animation pattern with this button
      • 52 – create and position a new PointText object for displaying text on the stage.
      • 53 – add text to the PointText object
      • 54-58 – style the text in the text object
      • 59-61 – justify the text in the button. This causes the registration point for the object to be centered. See also the x and y values for the text object created on line 52
      • 62-63 – add the gray rectangle and the text to the Group for this button
      • 64-65 – position this button on the stage
      • 66 – associate the name of the animation shape with this button
      • 67 – add this button to the array of button objects
      • 68 – iterate the y position variable for the buttons
    • 70 – add some space between the preceding buttons and the play/pause button
    • 72-91 – create the play/pause button the same way the as the buttons created on lines 43-67
  • 94-98 – initObjects() – create a number of circle graphics equal to the value of the startingObjects variable
  • 99-108 – addObject() – create a circle graphic and add it to the stage
    • 100 – create a new Circle display object
    • 101-104 – color in the circle and give it an outline
    • 105 – add the circle to the objects array
    • 106 – increase the value of numObjects by one
    • 107 – adjust the spacing of the circle graphics in the animation
  • 109-112 – removeObjects() – not used in this demo
  • 114-118 – randomRGB() – create and return a random hexadecimal value between 0 and 255, inclusive.
  • 121-133 – onMouseDown() – listen for the mouseDown event on the stage
    • 122-129 – iterate through the buttons to see if one of them intersected the click event
      • 123 – if a point on a button has intersected the the coordinates of the mouse click…
      • 124 – set the current animation shape to equal the shape associated with that button
      • 125-127 – update the screen to reflect this change (these lines are only needed if the animation is paused)
    • 130-132 – check to see if the play/pause button intersected the click coordinates, and if so, toggle the isPaused boolean value
  • 134-147 – onMouseMove() – listen for mouse move events on the stage
    • 135-141 – iterate through the buttons to see if one of them is currently being moused over
      • 136-137 – if a button is being moused over, set its fill color to white
      • 138-140 – if not, set its fill color to light gray
    • 142-143 – if the pause button is moused over, set its fill color to white.
    • 144-146 – if not, set its fill color to light gray
  • 149-199 – onFrame(e) – built-in Paper.js method to allow frame-based animations
    • 150 – if the animation is paused, do nothing
    • 151-197 – iterate through the circle graphics and update the position of each
      • 152-194 – for each circle, figure out where it should be based on its position within the list of circle objects, and the value of the currentShape variable
      • 195-196 – update the position of the circle graphic on the stage
    • 198 – update the rotation of the animation for the next frame

So there it is: a trigonometric curves explorer app, done up with Paper.js. It takes a little more work to get things on the screen, and event handling is not as simple as some other libraries, but the level of control over the graphics, and the performance compared to Easel, oCanas, and Raphael, more than make up for the difference.

As with the other posts in this series, the code for the various shapes of the animations comes from the Simple Trigonometric Curves Tutorial over at Kongregate.

Enjoy!


Posted in ProgrammingTagged math, procedural art comment on HTML5 Canvas Drawing Library Exploration: Paper.js

HTML5 Canvas Drawing Library Exploration: Raphael.js

2012-02-05 John Winkelman

This is the third post in a series of articles exploring Javascript drawing libraries. Others covered at this point include Easel.js and oCanvas.js.

The next library I am going to cover is Raphael.js. This one is a little different. Instead drawing to the canvas element, it makes use of SGV in modern browsers, and VML in old versions of Internet Explorer. Therefore it actually works in browsers all the way back to IE6!

From a programming perspective there isn’t much difference from the other libraries. Using SVG simplifies a lot of things, because SVG display elements are part of the HTML DOM, so the Raphael library doesn’t need to “fake it” with custom objects. On the other hand, because there are more individual elements on the screen at any one time – as opposed to drawings of elements in the canvas tag – performance tends to decline more quickly as visual complexity increases.

Once again, I have created the Trigonometron, trying to keep everything as close as I can to the code structure in the earlier articles.

Click here to launch the demo.

HTML

<!DOCTYPE html>
<html>
	<head>
		<style>
			body {background:#ffffff;margin:0;padding:0;overflow:hidden;}
			#myCanvas {position:absolute;left:0;top:0;width:800px;height:480px;}
		</style>
		<script type="text/javascript" src="raphael-min.js"></script>
	</head>
	<body>
		<div id="myCanvas"></div">
		<script type="text/javascript">
			// code goes here
		</script>
	</body>
</html>

As usual, not a whole lot to see here. Note that, instead of using a canvas element, we are using a div element. This is the element which will contain all of the SVG/VML pieces created by Raphaël.

Javascript

/*	global variables	*/
var canvas,
	currentShape="circle",
	isPaused = true,
	isInitialized = false;

/*	math and positioning	*/
var shapes = ["circle","tricuspoid","tetracuspoid","epicycloid","epicycloid 2","epicycloid 3","lissajous","lemniscate","butterfly"];
var w = 800;
var h = 480;
var centerX = 240;
var centerY = 240;
var radius_x = 150;
var radius_y = 150;
var theta = 0;
var objects = [];
var numObjects = 0;
var r2d = 180/Math.PI;
var d2r = Math.PI/180;
var orbitSteps = 180;
var orbitSpeed = Math.PI*2/orbitSteps;
var objectInterval;
var objectPosition;
var direction = 1;
var index = 0;
var xVar1 = 0;
var xVar2;
var xVar3;
var xVar4;
var startingObjects = 100;
var newX;
var newY;

onload = init;

function init() {
	canvas = new Raphael("myCanvas",800,480);
	initInterface();
	initObjects();
	onEnterFrame();
	isInitialized = true;
	setInterval(onEnterFrame,25);
}
function initInterface() {
	var xOff = 625;
	var yOff = 25;
	for(var i=0;i<shapes.length;i++) {
		var btn = canvas.rect(xOff,yOff,150,20)
			.attr("fill","#ededed")
			.attr("strokeColor","#808080")
			.data("shapeName",shapes[i])
			.mouseover(function(){
				document.getElementById("myCanvas").style.cursor="pointer";
				this.attr("fill","#ffffff");
			})
			.mouseout(function(){
				document.getElementById("myCanvas").style.cursor="auto";
				this.attr("fill","#ededed");
			})
			.click(function(){
				currentShape = this.data("shapeName");
				isInitialized = false;
				onEnterFrame();
				isInitialized = true;
			});
		var txt = canvas.text(xOff+75,yOff+10,shapes[i]).attr({fill:"#000000","font-size":14,"font-family":"Courier","text-anchor":"middle"});
			txt.mouseover(function(){
				document.getElementById("myCanvas").style.cursor="pointer";
				this.graphicBase.attr("fill","#ffffff");
			})
			.mouseout(function(){
				document.getElementById("myCanvas").style.cursor="auto";
				this.graphicBase.attr("fill","#ededed");
			})
			.click(function(){
				currentShape = this.graphicBase.data("shapeName");
				isInitialized = false;
				onEnterFrame();
				isInitialized = true;
			});
		txt.graphicBase = btn;
		yOff += 23;
	}
	yOff += 23;
	var pauseBtn = canvas.rect(xOff,yOff,150,20)
		.attr("fill","#ededed")
		.attr("strokeColor","#808080")
		.mouseover(function(){
			document.getElementById("myCanvas").style.cursor="pointer";
			this.attr("fill","#ffffff");
		})
		.mouseout(function(){
			document.getElementById("myCanvas").style.cursor="auto";
			this.attr("fill","#ededed");
		})
		.click(function(){
			isPaused = !isPaused;
		});
	var txt = canvas.text(xOff+75,yOff+10,"PLAY/PAUSE").attr({fill:"#000000","font-size":14,"font-family":"Courier","text-anchor":"middle"});
	txt.graphicBase = pauseBtn;
	txt.mouseover(function(){
			document.getElementById("myCanvas").style.cursor="pointer";
			this.graphicBase.attr("fill","#ffffff");
		})
		.mouseout(function(){
			document.getElementById("myCanvas").style.cursor="auto";
			this.graphicBase.attr("fill","#ededed");
		})
		.click(function(){
			isPaused = !isPaused;
		});
}

function initObjects() {
	for(var i=0;i<startingObjects;i++) {
		addObject();
	}
}
function addObject() {
	var obj = canvas.circle(centerX,centerY,5);
	obj.attr({
		fill:'#'+randomRGB()+randomRGB()+randomRGB(),
		stroke:'#000000'
	});
	objects.push(obj);
	numObjects = objects.length;
	objectInterval = orbitSteps/numObjects;
}
function removeObject() {
	numObjects = objects.length;
	objectInterval = orbitSteps/numObjects;
}

function randomRGB(){
	var s = Math.floor(Math.random()*256).toString(16);
	if(s.length==1) s = "0"+s;
	return s;
}
function onEnterFrame() {
	if(isPaused==true && isInitialized==true) return;
	for(var i = 0; i < numObjects; i++) {
		objectPosition = orbitSpeed*objectInterval*i;    //    each object is individually updated
		switch(currentShape) {
			case "circle":
				newX = centerX + radius_x * Math.cos(theta + objectPosition);
				newY = centerY + radius_y * Math.sin(theta + objectPosition);
				break;
			case "tricuspoid":
				newX = centerX + (radius_x*.5) * ((2 * Math.cos(theta + objectPosition)) + Math.cos(2 * (theta + objectPosition)));
				newY = centerY + (radius_y*.5) * ((2 * Math.sin(theta + objectPosition)) - Math.sin(2 * (theta + objectPosition)));
				break;
			case "tetracuspoid":
				newX = centerX + radius_x * Math.pow((Math.cos(theta + objectPosition)),3);
				newY = centerY + radius_y * Math.pow((Math.sin(theta + objectPosition)),3);
				break;
			case "epicycloid":
				newX = centerX + (radius_x*.4) * Math.cos(theta + objectPosition) - radius_x*1*(Math.cos((radius_x/radius_x + 1) * (theta + objectPosition)));
				newY = centerY + (radius_y*.4) * Math.sin(theta + objectPosition) - radius_y*1*(Math.sin((radius_y/radius_y + 1) * (theta + objectPosition)));
				break;
			case "epicycloid 2":
				newX = centerX + (radius_x*.4) * Math.cos(theta + objectPosition) - radius_x*1*(Math.cos((radius_x/radius_x + 2) * (theta + objectPosition)));
				newY = centerY + (radius_y*.4) * Math.sin(theta + objectPosition) - radius_y*1*(Math.sin((radius_y/radius_y + 2) * (theta + objectPosition)));
				break;
			case "epicycloid 3":
				newX = centerX + (radius_x*.4) * Math.cos(theta + objectPosition) - radius_x*1*(Math.cos((radius_x/radius_x + 3) * (theta + objectPosition)));
				newY = centerY + (radius_y*.4) * Math.sin(theta + objectPosition) - radius_y*1*(Math.sin((radius_y/radius_y + 3) * (theta + objectPosition)));
				break;
			case "lissajous":
				newX = centerX + radius_x * (Math.sin(3 * (theta + objectPosition) + xVar1));
				newY = centerY + radius_y * Math.sin(theta + objectPosition);
				xVar1 += .002;
				break;
			case "lemniscate":
				newX = centerX + (radius_x*1.2) * ((Math.cos(theta + objectPosition)/(1 + Math.pow(Math.sin(theta + objectPosition),2))));
				newY = centerY + (radius_y*1.2) * (Math.sin(theta + objectPosition) * (Math.cos(theta + objectPosition)/(1 + Math.pow(Math.sin(theta + objectPosition),2))));
				break;
			case "butterfly":
				newX = centerX + (radius_x*.4) * (Math.cos(theta + objectPosition) * (Math.pow(5,Math.cos(theta+objectPosition)) - 2 * Math.cos(4 * (theta+objectPosition)) - Math.pow(Math.sin((theta+objectPosition)/12),4)));
				newY = centerY + (radius_y*.4) * (Math.sin(theta + objectPosition) * (Math.pow(5,Math.cos(theta+objectPosition)) - 2 * Math.cos(4 * (theta+objectPosition)) - Math.pow(Math.sin((theta+objectPosition)/12),4)));
				break;
			default:
				break;
	
		}
		objects[i].attr('cx',newX);
		objects[i].attr('cy',newY);
	}
	theta += (orbitSpeed*direction);
}

Here is line-by-line breakdown of the above code.

  • 2-5 – initialize global variables
  • 8-32 – initialize variables for the animation. Not Raphaël-specific
  • 34 – set the init() function to fire when the page finishes loading
  • 36-43 – init()
    • 37 – create a new Raphaël object
    • 38 – create the user interface
    • 39 – initialize the animation code
    • 40 – display the initial pattern on the screen
    • 42 – start the animation
  • 44-112 – initInterface()
    • 45-46 initialize the variables used to position the UI buttons
    • 47-83 – create one UI button for each animation pattern
      • 48-51 – create and style a gray rectangle
      • 52-55 – add the mouseover functionality
      • 56-59 – add the mouseout functionality
      • 60-65 – add the onclick functionality
      • 66 – create a text object
      • 67-70 – add mouseover functionality to the text object. This is necessary because, as a DOM element, the text object will block mouse events from reaching the gray square beneath it. Elements cannot be nested in Raphaël, so they must instead be positioned and stacked.
      • 71-74 – add mouseout functionality to the text object
      • 75-80 – add onclick functionality to the text object
      • 81- associate the button object underneath each text object with that text object
      • 82 – update the vertical positioning variable for the next button
      • 84 – add some space between the pattern buttons and the play/pause button
      • 85-111 – create the play/pause button, using the same methods as the pattern buttons above
  • 114-118 – initObjects()
    • 115-116 – create a number of circles on the screen equal to the value in the startingObjects variable
  • 119-128 – addObject()
    • 120 – create a new “circle” graphic object
    • 121-124 – style the color and outline stroke of the circle
    • 125 – add the circle to the objects array
    • 126-127 – update the variable which controls spacing between the circles on the screen
  • 129-132 – removeObject()  – not used in this demonstration
    • 130-131 – update the variable which controls spacing between the circles on the screen
  • 134-138 – function randomRGB() – create and return a random hexadecimal number between 0 and 255, inclusive.
  • 139-189 – onEnterFrame()
    • This is the function which animates the circles based on the current animation pattern, which is held in the variable “currentShape”
      • 140 – if the animation is currently paused, do nothing
      • 141 – begin iterating through each object in the animation
      • 142 – get the position of the circle graphic in the sequence of graphic objects
      • 143-184 – based on the variable “currentShape”, determine the new position of the circle graphic within the animation
      • 185-186 – update the position of the circle graphic on the screen
      • 188 – increment the rotation of the entire animation

So there you have it: A simple web app writting in Javascript, using the Raphaël graphics library. Be sure, when using this library, to remember that you are working with vector graphics and DOM elements, not custom Javascript objects drawn onto the <canvas/> element.

As in the other articles in this series, the math for the animations comes from my Simple Trigonometric Curves Tutorial over at Kongregate.

If you come up with something interesting using the Raphaël library, be sure to post a link to it in the comments!

Posted in ProgrammingTagged math, procedural art comment on HTML5 Canvas Drawing Library Exploration: Raphael.js

HTML5 Canvas Drawing Library Exploration: oCanvas.js

2012-01-29 John Winkelman

This is part 2 of an ongoing series exploring the different Javascript/canvas element drawing libraries which are currently in use.

oCanvas.js is another small-footprint, easy to use Javascript library. In use it is similar to Easel.js (see my review of easel.js here), but the syntax is a little simpler. Where Easel feels more like Actionscript, oCanvas feels more like jQuery. This makes sense, since Easel was written to appeal to Flash developers.

Other than syntax, oCanvas and Easel seem to be interchangeable. Easel might have more fine-tuned control over drawing, but not enough to make a significant difference in any but the most complex web applications.

oCanvas is a lot of fun to play with, The syntax is easy to pick up; the documentation is well structured, and anyone familiar with jQuery should be able to extrapolate from the examples on the oCanvas site and have something up and running in a few minutes.

The only real downside to oCanvas is that no-one appears to be using it. Almost all of the articles I found which talk about oCanvas are of the “here are a dozen new Javascript drawing libraries” type, and they only link back to the oCanvas page. No examples out in the wild. No demos or source code other than that created by the oCanvas team. I think that is a shame. oCanvas deserves more attention than that.

So here is a simple demonstration of oCanvas, along with source code and commentary. Enjoy!

Click to Launch the demo.

HTML

<!DOCTYPE html>
<html>
	<head>
		<title>oCanvas.js demo</title>
		<style>
			* {margin:0;padding:0;}
			body {background:#ffffff;margin:0;padding:0;overflow:hidden;}
			#myCanvas {position:absolute;left:0;top:0;width:800px;height:480px;background:#ffffff;}
		</style>
		<script type="text/javascript" src="ocanvas.js"></script>
		<script type="text/javascript" src="ocanvas-test-code.js"></script>
	</head>
	<body>
		<canvas id="myCanvas" width="800" height="480"></canvas>
	</body>
</html>

Nothing too exciting in the HTML. Be sure to include the width and height attributes in the canvas element so that the graphics therein are not distorted.

Javascript

/*	global variables	*/
var canvas,
	currentShape="circle",
	isPaused = true,
	isInitialized = false;

/*	math and positioning	*/
var shapes = ["circle","tricuspoid","tetracuspoid","epicycloid","epicycloid 2","epicycloid 3","lissajous","lemniscate","butterfly"];
var w = 800;
var h = 480;
var centerX = 240;
var centerY = 240;
var radius_x = 150;
var radius_y = 150;
var theta = 0;
var objects = [];
var numObjects = 0;
var r2d = 180/Math.PI;
var d2r = Math.PI/180;
var orbitSteps = 180;
var orbitSpeed = Math.PI*2/orbitSteps;
var objectInterval;
var objectPosition;
var direction = 1;
var index = 0;
var xVar1 = 0;
var xVar2;
var xVar3;
var xVar4;
var startingObjects = 100;
var newX;
var newY;

onload = init;

function init() {
	canvas = oCanvas.create({
		canvas: "#myCanvas",
		background: "#ffffff"
	});
	
	initInterface();
	initObjects();
	
	
	onEnterFrame();
	isInitialized = true;
	canvas.setLoop(onEnterFrame).start();
}

function initInterface() {
	var xOff = 625;
	var yOff = 25;
	for(var i=0;i<shapes.length;i++) {
		var b = canvas.display.rectangle({
			x:xOff,
			y:yOff,
			width:150,
			height:20,
			fill:'#ededed',
			stroke:'1px outside #808080',
			shapeName:shapes[i]
		});
		var txt = canvas.display.text({
			x:75,
			y:4,
			align:'center',
			font:'12px courier,monospace',
			text:shapes[i],
			fill:'#000000'
		});
		b.addChild(txt);
		b.bind('mouseenter',function(){
			document.getElementById("myCanvas").style.cursor="pointer";
			this.fill = '#ffffff';
		});
		b.bind('mouseleave',function(){
			document.getElementById("myCanvas").style.cursor="auto";
			this.fill = '#ededed';
		});
		b.bind('click',function(){
			currentShape = this.shapeName;
			isInitialized = false;
			onEnterFrame();
			isInitialized = true;
		});
		yOff += 23;
		canvas.addChild(b);
	}
	yOff += 23;
	var pauseButton = canvas.display.rectangle({
		x:xOff,
		y:yOff,
		width:150,
		height:20,
		fill:'#ededed',
		stroke:'1px outside #808080'
	});
	var pauseButtonText = canvas.display.text({
		x:75,
		y:4,
		align:'center',
		font:'12px courier,monospace',
		text:"PLAY/PAUSE",
		fill:'#000000'
	});
	pauseButton.addChild(pauseButtonText);
	pauseButton.bind('mouseenter',function(){
		document.getElementById("myCanvas").style.cursor="pointer";
		this.fill = '#ffffff';
	});
	pauseButton.bind('mouseleave',function(){
		document.getElementById("myCanvas").style.cursor="auto";
		this.fill = '#ededed';
	});
	pauseButton.bind('click',function() {
		isPaused = !isPaused;
	});
	canvas.addChild(pauseButton);

}
function initObjects() {
	for(var i=0;i<startingObjects;i++) {
		addObject();
	}
}
function addObject() {
var obj = canvas.display.ellipse({
		x:centerX,
		y:centerY,
		radius_x:5,
		radius_y:5,
		stroke:"1px #000000",
		fill:"#"+randomRGB()+randomRGB()+randomRGB()
	});
	objects.push(obj);
	numObjects = objects.length;
	objectInterval = orbitSteps/numObjects;
	canvas.addChild(obj);
}
function removeObject() {
	numObjects = objects.length;
	objectInterval = orbitSteps/numObjects;
}

function randomRGB(){
	var s = Math.floor(Math.random()*256).toString(16);
	if(s.length==1) s = "0"+s;
	return s;
}
function onEnterFrame() {
	if(isPaused==true && isInitialized==true) return;
	for(var i = 0; i < numObjects; i++) {
		objectPosition = orbitSpeed*objectInterval*i;    //    each object is individually updated
		switch(currentShape) {
			case "circle":
				newX = centerX + radius_x * Math.cos(theta + objectPosition);
				newY = centerY + radius_y * Math.sin(theta + objectPosition);
				break;
			case "tricuspoid":
				newX = centerX + (radius_x*.5) * ((2 * Math.cos(theta + objectPosition)) + Math.cos(2 * (theta + objectPosition)));
				newY = centerY + (radius_y*.5) * ((2 * Math.sin(theta + objectPosition)) - Math.sin(2 * (theta + objectPosition)));
				break;
			case "tetracuspoid":
				newX = centerX + radius_x * Math.pow((Math.cos(theta + objectPosition)),3);
				newY = centerY + radius_y * Math.pow((Math.sin(theta + objectPosition)),3);
				break;
			case "epicycloid":
				newX = centerX + (radius_x*.4) * Math.cos(theta + objectPosition) - radius_x*1*(Math.cos((radius_x/radius_x + 1) * (theta + objectPosition)));
				newY = centerY + (radius_y*.4) * Math.sin(theta + objectPosition) - radius_y*1*(Math.sin((radius_y/radius_y + 1) * (theta + objectPosition)));
				break;
			case "epicycloid 2":
				newX = centerX + (radius_x*.4) * Math.cos(theta + objectPosition) - radius_x*1*(Math.cos((radius_x/radius_x + 2) * (theta + objectPosition)));
				newY = centerY + (radius_y*.4) * Math.sin(theta + objectPosition) - radius_y*1*(Math.sin((radius_y/radius_y + 2) * (theta + objectPosition)));
				break;
			case "epicycloid 3":
				newX = centerX + (radius_x*.4) * Math.cos(theta + objectPosition) - radius_x*1*(Math.cos((radius_x/radius_x + 3) * (theta + objectPosition)));
				newY = centerY + (radius_y*.4) * Math.sin(theta + objectPosition) - radius_y*1*(Math.sin((radius_y/radius_y + 3) * (theta + objectPosition)));
				break;
			case "lissajous":
				newX = centerX + radius_x * (Math.sin(3 * (theta + objectPosition) + xVar1));
				newY = centerY + radius_y * Math.sin(theta + objectPosition);
				xVar1 += .002;
				break;
			case "lemniscate":
				newX = centerX + (radius_x*1.2) * ((Math.cos(theta + objectPosition)/(1 + Math.pow(Math.sin(theta + objectPosition),2))));
				newY = centerY + (radius_y*1.2) * (Math.sin(theta + objectPosition) * (Math.cos(theta + objectPosition)/(1 + Math.pow(Math.sin(theta + objectPosition),2))));
				break;
			case "butterfly":
				newX = centerX + (radius_x*.4) * (Math.cos(theta + objectPosition) * (Math.pow(5,Math.cos(theta+objectPosition)) - 2 * Math.cos(4 * (theta+objectPosition)) - Math.pow(Math.sin((theta+objectPosition)/12),4)));
				newY = centerY + (radius_y*.4) * (Math.sin(theta + objectPosition) * (Math.pow(5,Math.cos(theta+objectPosition)) - 2 * Math.cos(4 * (theta+objectPosition)) - Math.pow(Math.sin((theta+objectPosition)/12),4)));
				break;
			default:
				break;
	
		}
		objects[i].x = newX;
		objects[i].y = newY;
	}
	theta += (orbitSpeed*direction);
}

Here is a line-by-line breakdown of the preceding Javascript:

  • 2-5
    • initializing global variables
  • 8-32
    • initializing variables for the demo. This is mostly all for the animation. Nothing here that is oCanvas-specific.
  • 34
    • This tells the browser to fire the init() function when the page finishes loading.
  • 36-49 – function init()
    • Fired when the page loads
      • 37-40 initialize the global canvas variable, and associate it with the HTML canvas element which has the id of “myCanvcas”
      • 42-43 – create the user interface, and initialize the objects for animation
      • 46 – call the animation function once in order to display the objects
      • 47 – set the global initialization state
      • 48 – begin the animation. By default the animation is paused
  • 51-121 – initInterface()
    • Create the user interface for the demo
      • 52-53 – set the base position for the UI buttons
      • 54-89 – create the UI buttons
        • 55-63 – create and style a rectangle graphic, and assign the “shapeName” property, which references one of the animation sequences
        • 64-71 – create and style a text block, which displays the name of one of the animation sequences
        • 72 – add the text block as a child of the rectangle graphic
        • 73-76 – add the mouseover behavior for the button
        • 77-80 – and the mouseout behavior for the button
        • 81-86 – add the onclick behavior to the button. Updates the “currentShape”  variable to equal the value of the button’s “shapeName” property
        • 87 – update the base Y position for the buttons
        • 88 – add the button object to the canvas object. This is how objects are made visible in oCanvas
      • 90 – update the Y variable to add some space between the preceding buttons and the play/pause button
      • 91-98 – create and style a rectangle graphic for the play/pause button
      • 99-106 – create a text block for the play/pause button
      • 107 – add the text block as a child of the play/pause button graphic
      • 108-111 – add mouseover functionality to the play/pause button
      • 112-115 – add mouseout functionality to the play/pause button
      • 116-118 – add onclick functionality to the play/pause button. A click will toggle the paused state of the demo
      • 119 – add the play/pause button to the canvas
  • 122-126 – initObjects()
    • This method counts up to the value of startingObjects and calls addObject once for each iteration
  • 127-140 – addObject()
    • this function creates a circle graphic, styles it, updates some of the animation variables, and adds the new object to the canvas
      • 128-135 – create and style a circle graphic
      • 136 – add the circle to the array of circles
      • 137 – update the numObjects variable to equal the number of elements in the objects array
      • 138 – update the spacing between circles, based on the number of circles in the animation
      • 139 – add the new circle graphic to the canvas
  • 141-144 – removeObject()
    • remove a circle from the animation. Not used in this demo
  • 146-150 – randomRGB()
    • create a random hexadecimal number between 0 and 255, convert it to a string, and return it for use in coloring the circle graphics.
  • 151-201 – onEnterFrame()
    • This is the function which animates the circles based on the current animation pattern, which is held in the variable “currentShape”
      • 152 – if the animation is currently paused, do nothing
      • 153 – begin iterating through each object in the animation
      • 154 – get the position of the circle in the sequence of circles
      • 155-196 – based on the variable “currentShape”, determine the new position of the circle within the animation
      • 197-198 – update the position of the circle within the canvas
      • 200 – increment the rotation of the entire animation

And there you have it. If you compare the code for this animation with the code in the Easel.js post, you will see that they are quite similar. The syntax for oCanvas is a little simpler, but it still allows the same control over style and position.

As in the other articles in this series, the math for the animations comes from my Simple Trigonometric Curves Tutorial over at Kongregate.

I hope that oCanvas gets some more attention from web developers. It is a worthy project.


Posted in ProgrammingTagged math, procedural art comment on HTML5 Canvas Drawing Library Exploration: oCanvas.js

HTML5 Canvas Drawing Library Exploration: Easel.js

2012-01-26 John Winkelman

I’ve spent the last few weeks, at home and at work, exploring some of the capabilities of HTML 5. The most exciting one for me, at the moment, is the Canvas element, which allows dynamic creation and updating of graphics within a web page. This type of functionality is useful for creating games, data visualizations, custom user interfaces, and most anything else that traditionally is considered to be in the realm of Adobe Flash.

In exploring the various tutorials I discovered that many people have put a lot of time into building Javascript libraries which add functionality to the canvas tag, making it more Flash-like. A side effect of this is that these libraries usually – though not always – simplify the coding process dramatically. What could take many hours and many hundreds of lines of custom code can now be accomplished in a short amount of time and relatively little code.

So starting with this post, and going on for the next few weeks, I will be posting examples of these libraries in use, along with source code and commentary. A note here: The examples will only work in browsers which support the canvas tag – Internet Explorer 9+, Firefox, Safari or Chrome on Windows, and Safari and Chrome on Macs, and Chrome and Konqueror on Linux. These examples should also work on most newer mobile devices using their default web browsers. However, things might be a little slow and clunky.

For this post, I am working with Easel.js (current version 0.4), a canvas drawing library created by Flash guru Grant Skinner.

When I learn a new language or technology, I consider the first sign of success to be when I manage to get a bunch of objects to spin in a circle. The canvas tag libraries are no different. For this, and the next several, I have re-created the Trigonometron (which seems to have not made the transition to the new site…), one of my proudest moments as a Flash developer.

Click to launch the demo.

Detailed breakdown of the code follows:

HTML

<!DOCTYPE html>
<html>
	<head>
		<title>Easel.js demo</title>
		<style>
			* {margin:0;padding:0;}
			body {background:#ffffff;margin:0;padding:0;overflow:hidden;}
			#myCanvas {position:absolute;left:0;top:0;width:800px;height:480px;background:#ffffff;}
		</style>
		<script type="text/javascript" src="easel.js"></script>
		<script type="text/javascript" src="easel-demo-code.js"></script>
	</head>
	<body>
		<canvas id="myCanvas" width="800" height="480"></canvas>
	</body>
</html>

Nothing particularly amazing about this HTML. Note that I used the width and height attributes in the canvas tag, rather than simply relying on the style sheet. This is a quirk of Easel.js – if the width and height attributes are not set, then it will visibly skew and stretch the graphics inside the canvas tag. Hopefully this will be addressed in an upcoming release.

Javascript

/*	global variables	*/
var canvas,
	stage,
	currentShape="circle",
	isPaused = true,
	isInitialized = false;

/*	math and positioning	*/
var shapes = ["circle","tricuspoid","tetracuspoid","epicycloid","epicycloid 2","epicycloid 3","lissajous","lemniscate","butterfly"];
var w = 800;
var h = 480;
var centerX = 240;
var centerY = 240;
var radius_x = 150;
var radius_y = 150;
var theta = 0;
var objects = [];
var numObjects = 0;
var r2d = 180/Math.PI;
var d2r = Math.PI/180;
var orbitSteps = 180;
var orbitSpeed = Math.PI*2/orbitSteps;
var objectInterval;// = orbitSteps/numObjects;
var objectPosition;
var direction = 1;
var index = 0;
var xVar1 = 0;
var xVar2;
var xVar3;
var xVar4;
var startingObjects = 100;
var newX;
var newY;

onload = initEaselDemo;

function initEaselDemo() {
	canvas = document.getElementById("myCanvas");
	stage = new Stage(canvas);
	stage.enableMouseOver(36)
	stage.mouseEnabled = true;
	
	initInterface();
	initObjects();
	
	//	set 
	Ticker.setFPS(36);
	Ticker.addListener(window);
	tick();
	isInitialized = true;
}

function initInterface() {
	var interfaceBase = new Container();
	interfaceBase.x = 630;
	interfaceBase.y = 20;
	for(var i=0;i<shapes.length;i++) {
		var b = new Container();
		b.mouseEnabled = true;
		b.shape = shapes[i];
		var g = new Graphics();
		g.setStrokeStyle(1)
			.beginStroke('#808080')
			.beginFill('#ededed')
			.rect(0,0,150,20);
		var s = new Shape(g);
		s.x = 0;
		s.y = 0;
		
		var t = new Text(shapes[i],"12px Courier","#000000");
		t.textAlign="center";
		t.x = 75;
		t.y = 14;
		
		b.addChild(s);
		b.addChild(t);
		b.x = 0;
		b.y = i*23;
		b.onMouseOver = function(e) {
			document.getElementById("myCanvas").style.cursor="pointer";
			e.target.getChildAt(0).graphics.beginFill("#ffffff").rect(0,0,150,20);
			if(isPaused) stage.update();
		}
		b.onMouseOut = function(e) {
			document.getElementById("myCanvas").style.cursor="auto";
			e.target.getChildAt(0).graphics.beginFill("#ededed").rect(0,0,150,20);
			if(isPaused) stage.update();
		}
		b.onClick = function(e) {
			currentShape = e.target.shape;
			isInitialized = false;
			tick();
			isInitialized = true;
		}
		
		interfaceBase.addChild(b);


	}
	var ppb = new Container();
	ppb.x = 0;
	ppb.y = (shapes.length*23+10);
	var ppg = new Graphics()
		.setStrokeStyle(1)
		.beginStroke('#808080')
		.beginFill('#ededed')
		.rect(0,0,150,20);
	var pps = new Shape(ppg);
	pps.x = 0;
	pps.y = 0;
	var ppt = new Text("PLAY/PAUSE","12px Arial,sans-serif","#000000");
	ppt.textAlign = "center";
	ppt.x = 75;
	ppt.y = 14;
	ppb.addChild(pps);
	ppb.addChild(ppt);
	ppb.onMouseOver = function(e){
		document.getElementById("myCanvas").style.cursor="pointer";
		e.target.getChildAt(0).graphics.beginFill("#ffffff").rect(0,0,150,20);
		stage.update();
	}
	ppb.onMouseOut = function(e){
		document.getElementById("myCanvas").style.cursor="auto";
		e.target.getChildAt(0).graphics.beginFill("#ededed").rect(0,0,150,20);
		stage.update();
	}
	ppb.onClick = function() {
		isPaused = !isPaused;
	}
	interfaceBase.addChild(ppb);
	
	stage.addChild(interfaceBase);
}
function initObjects() {
	for(var i=0;i<startingObjects;i++) {
		addObject();
	}
}
function addObject() {
	var g = new Graphics()
		.setStrokeStyle(1)
		.beginStroke("#000000")
		.beginFill("#"+randomRGB()+randomRGB()+randomRGB())
		.drawCircle(0,0,5)
		.endFill();
	var s = new Shape(g);
	s.x = centerX;
	s.y = centerY;
	objects.push(s);
	numObjects = objects.length;
	objectInterval = orbitSteps/numObjects;
	stage.addChild(s);
}
function removeObject() {
	numObjects = objects.length;
	objectInterval = orbitSteps/numObjects;
}

function randomRGB(){
	var s = Math.floor(Math.random()*256).toString(16);
	if(s.length==1) s = "0"+s;
	return s;
}
function tick() {
	if(isPaused==true && isInitialized==true) return;
	for(var i = 0; i < numObjects; i++) {
		objectPosition = orbitSpeed*objectInterval*i;    //    each object is individually updated
		switch(currentShape) {
			case "circle":
				newX = centerX + radius_x * Math.cos(theta + objectPosition);
				newY = centerY + radius_y * Math.sin(theta + objectPosition);
				break;
			case "tricuspoid":
				newX = centerX + (radius_x*.5) * ((2 * Math.cos(theta + objectPosition)) + Math.cos(2 * (theta + objectPosition)));
				newY = centerY + (radius_y*.5) * ((2 * Math.sin(theta + objectPosition)) - Math.sin(2 * (theta + objectPosition)));
				break;
			case "tetracuspoid":
				newX = centerX + radius_x * Math.pow((Math.cos(theta + objectPosition)),3);
				newY = centerY + radius_y * Math.pow((Math.sin(theta + objectPosition)),3);
				break;
			case "epicycloid":
				newX = centerX + (radius_x*.4) * Math.cos(theta + objectPosition) - radius_x*1*(Math.cos((radius_x/radius_x + 1) * (theta + objectPosition)));
				newY = centerY + (radius_y*.4) * Math.sin(theta + objectPosition) - radius_y*1*(Math.sin((radius_y/radius_y + 1) * (theta + objectPosition)));
				break;
			case "epicycloid 2":
				newX = centerX + (radius_x*.4) * Math.cos(theta + objectPosition) - radius_x*1*(Math.cos((radius_x/radius_x + 2) * (theta + objectPosition)));
				newY = centerY + (radius_y*.4) * Math.sin(theta + objectPosition) - radius_y*1*(Math.sin((radius_y/radius_y + 2) * (theta + objectPosition)));
				break;
			case "epicycloid 3":
				newX = centerX + (radius_x*.4) * Math.cos(theta + objectPosition) - radius_x*1*(Math.cos((radius_x/radius_x + 3) * (theta + objectPosition)));
				newY = centerY + (radius_y*.4) * Math.sin(theta + objectPosition) - radius_y*1*(Math.sin((radius_y/radius_y + 3) * (theta + objectPosition)));
				break;
			case "lissajous":
				newX = centerX + radius_x * (Math.sin(3 * (theta + objectPosition) + xVar1));
				newY = centerY + radius_y * Math.sin(theta + objectPosition);
				xVar1 += .002;
				break;
			case "lemniscate":
				newX = centerX + (radius_x*1.2) * ((Math.cos(theta + objectPosition)/(1 + Math.pow(Math.sin(theta + objectPosition),2))));
				newY = centerY + (radius_y*1.2) * (Math.sin(theta + objectPosition) * (Math.cos(theta + objectPosition)/(1 + Math.pow(Math.sin(theta + objectPosition),2))));
				break;
			case "butterfly":
				newX = centerX + (radius_x*.4) * (Math.cos(theta + objectPosition) * (Math.pow(5,Math.cos(theta+objectPosition)) - 2 * Math.cos(4 * (theta+objectPosition)) - Math.pow(Math.sin((theta+objectPosition)/12),4)));
				newY = centerY + (radius_y*.4) * (Math.sin(theta + objectPosition) * (Math.pow(5,Math.cos(theta+objectPosition)) - 2 * Math.cos(4 * (theta+objectPosition)) - Math.pow(Math.sin((theta+objectPosition)/12),4)));
				break;
			default:
				break;
	
		}
		objects[i].x = newX;
		objects[i].y = newY;
	}
	theta += (orbitSpeed*direction);
	stage.update();
}

Here is a line-by-line breakdown of what is going on in the above code:

  • 2 – 6
    • Declare the global variables for Easel.js, and set the initial environment for the trigonometron code.
  • 9 – 33
    • These are all variables for the trigonometry functions. They are not specific to Easel.js
  • 35:  onload = initEaselDemo
    • This line tell the browser to, once the page is finished loading, run the method called “initEaselDemo()”
  • 37-51 initEaselDemo();
    • This method initializes the global variables.
      • 38 – assign the variable canvas to the HTML element with the ID “myCanvas”
      • 39 – initialize the stage object
      • 40 – tell the stage to listen for mouseover events 36 times a second
      • 41 – allow the stage to register mouse events
      • 43 – initialize the user interface for the trigonometron
      • 44 – initialize the animated circles
      • 47-49 – initialize the Ticker object, which allows frame-based animation
      • 50 – everything is ready to begin
  • 53-134 initInterface();
    • This method creates all of the user control elements, styles them and adds text, and assigns mouse event listeners
      • 54-56 – create and position a container for all of the user control elements
      • 57-100 – iterate through all of the elements in the shapes[] array, and create a button for each
        • 58 – create a container for the button elements
        • 59 – enable mouse events on the button
        • 60 – b.shape is a custom attribute I am adding so that arbitrary values can be assigned to each button
        • 61-65 – create a graphic element, and use it to draw a rectangle
        • 66-68 – create a “shape” display object, and use it to display the graphic element
        • 70-73 – create, position, populate, and style a text object.
        • 75-76 – add the button graphic and the text object to the button container
        • 77-78 – position the button element
        • 79-83 – add onMouseOver functionality to the button – change the cursor to a pointer, change the button color, and update the stage to display the changed button
        • 84-88 – add onMouseOut functionality to the button; essentially identical to the onMouseOver functionality
        • 89-94 – add onClick functionality – switch to different shape for the animation, and show the new animation
        • 96 – add the button to the user control container
        • 101-103 – create and position a container for the elements of the play/pause button
        • 104-108 – create a graphic elements, and use it to draw a rectangle
        • 109-111 – create a “shape” display object, and use it to display the graphic element
        • 112-115 – create, position, populate, and style a text object
        • 116-117 – add the rectangle and the text to the play/pause button element container
        • 118-130 – add mouseover, mouseout, and click functionality to the play/pause button
        • 131 – add the play/pause button to the user control container
        • 132 – add the user control container to the stage
  • 135-139 initObjects();
    • This method counts up to the value of startingObjects and calls addObject once for each iteration
  • 140-154 addObject();
    • This method creates a circle and adds it to the display list
      • 141-146 – create a new circle graphic
      • 147-149 – create and position a display object for the circle
      • 150 – add the circle to the array of circles
      • 151 – update the total number of created circles
      • 152 – adjust the spacing of all the circles in the animation, based on the new number of circles
      • 153 – add the circle to the stage
  • 155-158 removeObjects();
    • this method removes objects from the display list. It is not currently being used
  • 160-164 randomRGB();
    • This method creates a random hexadecimal number between 0 and 255, converts it to a string, and returns it for use in coloring the circles
  • 165-216 tick();
    • This built-in Easel.js method is called based on the Ticker.setFPS() method call on line 47. It iterates through all of the circles in the objects[] array, and updates their positions on the stage, based on the current curve shape
      • 166 – if the trigonometron is paused, do nothing
      • 167- 210 – iterate through the objects, and based on the current curve shape, create new X and Y coordinates for each
      • 211-212 – update the position of each object to match its new coordinates
      • 214 – iterate theta, which is how much the circle should turn on each frame
      • 215 – update the stage to display the changed positions of the objects

So there it is: the entirety of the code for this Easel.js demo, line by line. I left out explanations of the math which calculates the positions of the objects; you can read more on that subject at my Simple Trigonometric Curves tutorial over on Kongregate.com.

Enjoy!

Posted in ProgrammingTagged math comment on HTML5 Canvas Drawing Library Exploration: Easel.js

Personal website of
John Winkelman

John Winkelman in closeup

Archives

Categories

Posts By Month

May 2025
S M T W T F S
 123
45678910
11121314151617
18192021222324
25262728293031
« Apr    

Links of Note

Reading, Writing
Tor.com
Locus Online
The Believer
File 770
IWSG

Watching, Listening
Writing Excuses Podcast
Our Opinions Are Correct
The Naropa Poetics Audio Archive

News, Politics, Economics
Naked Capitalism
Crooked Timber

Meta

  • Log in
  • Entries feed
  • Comments feed
  • WordPress.org

© 2025 Ecce Signum

Proudly powered by WordPress | Theme: x-blog by wpthemespace.com